The Honeywell T6 Pro Thermostat offers advanced temperature control, smart home integration, and energy-saving features. Designed for ease of use, it ensures efficient heating and cooling management.
1.1 Overview of the T6 Pro Thermostat
The Honeywell T6 Pro Thermostat is a programmable, Wi-Fi enabled device designed for smart temperature control. It features a sleek design, intuitive interface, and compatibility with various HVAC systems. The thermostat includes a UWP mounting system for easy installation and an optional decorative cover plate. It supports geofencing, smart home integration, and energy-saving modes. The T6 Pro also works seamlessly with the Honeywell Home app, allowing users to control settings remotely. Its advanced features ensure precise temperature management, while the optional cover plate helps maintain a clean appearance. This thermostat is ideal for homeowners seeking convenience, efficiency, and modern smart home capabilities.
1.2 Compatibility and Features
The Honeywell T6 Pro Thermostat is compatible with most HVAC systems, including gas, electric, and heat pumps. It supports both 24V and 120/240V systems, ensuring versatility. Key features include programmable scheduling, geofencing, and voice control through smart home systems like Amazon Alexa. The thermostat also offers energy-saving modes and remote access via the Honeywell Home app. It is Wi-Fi enabled, allowing seamless integration into smart home networks. The T6 Pro supports floor temperature sensors for hydronic systems and works with Honeywell’s 10K ohm sensors. Its compatibility and advanced features make it a comprehensive solution for modern home temperature management.
Pre-Installation Requirements
Ensure the power is turned off at the breaker box before starting. Gather tools like screwdrivers and wiring materials. Verify system compatibility and prepare the wall for mounting.
Review safety precautions to avoid electrical hazards. Check the package contents for completeness, including the thermostat, UWP system, and optional cover plate. Plan the installation layout carefully.
2.1 Tools and Materials Needed
To install the T6 Pro Thermostat, you will need a few essential tools and materials. Start with a screwdriver set, including Phillips and flathead screwdrivers, to handle various screws. Pliers may be necessary for wire stripping or bending. A drill and wall anchors are required for securing the UWP mounting system to the wall. Additionally, ensure you have a voltage tester to confirm power is off before starting. Gather any necessary wiring materials, such as wire nuts or connectors, to ensure proper electrical connections. Finally, have a level tool handy to ensure the mounting plate is straight and securely fastened.
2.2 Safety Precautions
Before starting the installation, ensure the power to your HVAC system is turned off at the circuit breaker or fuse box. Verify this with a voltage tester to prevent electrical shock. Avoid damaging existing wiring by handling it carefully and avoiding unnecessary bending or pulling. If you’re unsure about any step, consider consulting a licensed electrician. Keep the area around your workspace clear to prevent accidents. Never attempt to install the thermostat near open flames or sparks, and ensure all tools are properly insulated; Always follow the manufacturer’s guidelines to ensure a safe and successful installation process.
2.3 Understanding the Package Contents
Your T6 Pro Thermostat package includes the thermostat unit, UWP mounting system, Honeywell standard installation adapter, and a decorative cover plate. Additional items are mounting screws, wire labels, and a quick-start guide. The thermostat itself features a touchscreen interface and Wi-Fi connectivity for smart home integration. The UWP mounting system ensures secure installation on any wall type, while the decorative cover plate conceals any paint gaps from previous installations. Verify all components are present before starting to ensure a smooth installation process. Refer to the manual for detailed descriptions of each item and its purpose.
Installation Process
The T6 Pro Thermostat installation involves mounting the UWP system, aligning it with the thermostat, and gently pushing until it snaps into place. Turn on the power and set the time and date to begin configuration.
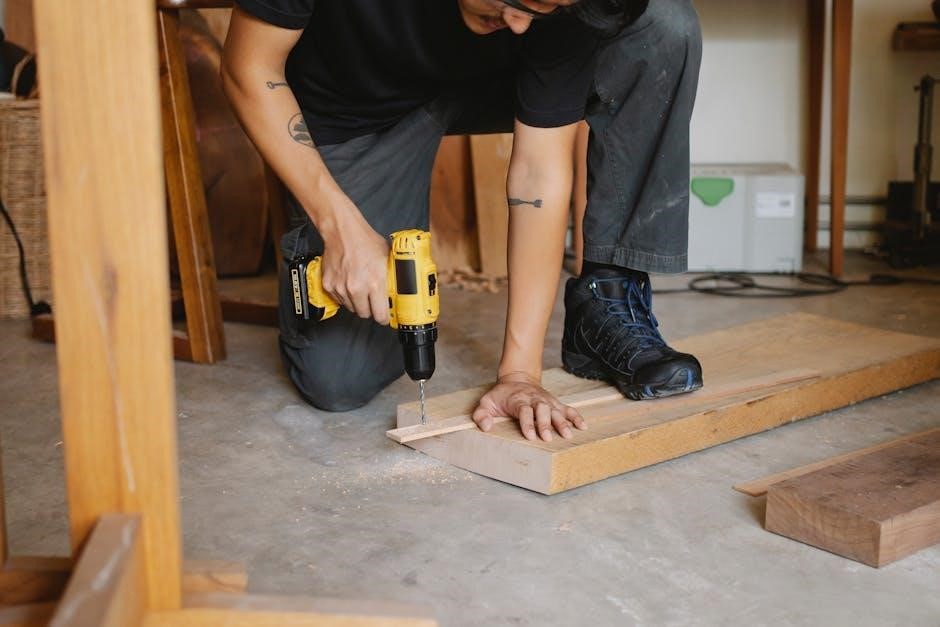
3.1 Mounting the UWP System
To mount the UWP system, first, ensure the wall anchors are securely installed. Place the UWP over the anchors and insert the mounting screws provided. Tighten the screws until the UWP is firmly attached, being careful not to overtighten. Use a level to ensure the UWP is straight and properly aligned. Once the UWP is mounted, the thermostat can be snapped into place, ensuring a secure and even installation. This step is crucial for the proper functioning and stability of the thermostat;
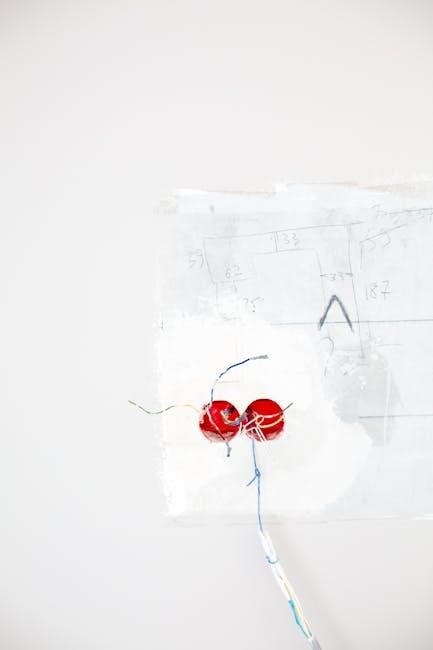
3.2 Connecting the Wires
Connecting the wires is a critical step in the installation process. Begin by pulling the wires through the wiring hole on the UWP system. Align the wires according to the wiring diagram provided in the manual, ensuring each wire is connected to the correct terminal on the thermostat. Double-check the connections to avoid any mismatches, as this could lead to improper functionality. Once all wires are securely connected, proceed to the next step. Refer to the manual for specific wiring configurations based on your HVAC system type. If unsure, consult a licensed electrician to ensure safe and correct installation.
3.3 Attaching the Thermostat to the Mounting Plate
Align the T6 Pro Thermostat with the UWP mounting plate, ensuring proper alignment of the hooks and snaps. Gently push the thermostat onto the plate until it clicks securely into place. Make sure the thermostat is level and evenly seated. If using the optional decorative cover plate, snap it onto the mounting plate to conceal any gaps or uneven paint. Tighten the screws provided if additional security is needed. Once attached, verify that the thermostat is firmly secured and ready for power connection. This step ensures a clean and professional installation, preparing the system for final setup and operation.
3.4 Using the Optional Cover Plate
The optional cover plate enhances the appearance of your T6 Pro Thermostat installation. It is ideal for covering paint gaps from previous thermostats or when mounting directly to a junction box. To install, align the cover plate with the mounting plate, ensuring it fits snugly. Gently snap the cover plate into place until it clicks, ensuring a secure fit. This step adds a polished look to your setup without affecting functionality. The cover plate is easy to attach and removes effortlessly for future adjustments or replacements, maintaining a seamless and professional finish for your smart thermostat installation.
Initial Setup and Configuration
Power on the thermostat at the breaker, set the time and date, then configure settings using the Honeywell Home app for a seamless experience.
4.1 Powering On and Setting Time/Date
After installation, locate the circuit breaker and switch it on to power the thermostat. Once powered, navigate to the time and date settings on the display. Use the touchscreen or buttons to set the current time and date accurately. Proper time and date settings are crucial for scheduling and energy management. Ensure the time zone is also correctly configured. If the thermostat has a backup battery, insert it to maintain settings during power outages. Once done, the thermostat will be ready for further configuration through the Honeywell Home app;
4.2 Configuring the Thermostat Using the Honeywell Home App
Download and install the Honeywell Home app from the App Store or Google Play. Launch the app and select the T6 Pro Thermostat model. Follow in-app instructions to connect the thermostat to your Wi-Fi network. Ensure the thermostat is powered on and in pairing mode. Once connected, use the app to set up scheduling, temperature preferences, and energy-saving modes. You can also enable geofencing and smart alerts for optimal performance. For multi-user households, invite others to manage the thermostat via the app. The app allows remote monitoring and adjustments, enhancing convenience and energy efficiency.
Advanced Features and Customization
The T6 Pro Thermostat offers smart home integration, geofencing, and custom scheduling. Users can optimize energy use with advanced settings and remote monitoring via the app.
5.1 Smart Home Integration
The T6 Pro Thermostat seamlessly integrates with popular smart home systems like Amazon Alexa and Google Assistant. Using the Honeywell Home app, users can control temperatures remotely, receive alerts, and automate settings. The app also allows for geofencing, adjusting temperatures based on your location. Additionally, the hidden PRO installation feature enables professionals to configure the thermostat and invite customers to connect, ensuring a smooth setup process. This integration enhances convenience, energy efficiency, and overall home comfort, making it a versatile choice for modern smart homes. The system ensures compatibility with various devices, providing a comprehensive smart home experience.
5.2 Energy-Saving Settings
The T6 Pro Thermostat offers advanced energy-saving features to optimize your home’s energy consumption. Its programmable scheduling allows you to set temperature adjustments based on your daily routine. The thermostat also includes smart alerts for unusual energy usage patterns, helping you identify and correct inefficiencies. Additionally, the Honeywell Home app provides detailed energy reports, enabling you to track and manage your energy usage effectively. Geofencing capabilities automatically adjust temperatures when you leave or arrive home, further enhancing energy savings. These features work together to reduce energy waste while maintaining comfort, ensuring your system operates efficiently and sustainably.
Troubleshooting and Maintenance
The T6 Pro Thermostat troubleshooting involves checking common issues and performing resets. Regular maintenance ensures optimal performance, extends lifespan, and maintains reliability.
6.1 Common Issues and Solutions
Common issues with the T6 Pro Thermostat include the device not turning on, incorrect temperature readings, or loss of connectivity. To resolve these, ensure the power is on at the breaker, check wire connections, and verify Wi-Fi settings. For display issues, restart the thermostat or perform a factory reset via the Installer Setup in the Resideo Pro app; If temperature readings are off, calibrate the sensor through the app. Connectivity problems can often be fixed by resetting the router or ensuring the thermostat is within range. Regularly updating firmware and checking for loose wires can prevent many issues.
6.2 Routine Maintenance Tips
Regular maintenance ensures optimal performance of the T6 Pro Thermostat. Clean the device with a soft cloth to remove dust and debris. Check wire connections to prevent loose links. Update firmware via the Honeywell Home app for the latest features and bug fixes. Replace batteries (if applicable) annually or when low-battery alerts appear. Inspect the UWP mounting system to ensure stability and level alignment. Run diagnostics through the app to identify potential issues early. Avoid exposing the thermostat to direct sunlight or moisture. Refer to the manual for detailed cleaning instructions to maintain functionality and extend the product’s lifespan effectively.
Leave a Reply
You must be logged in to post a comment.