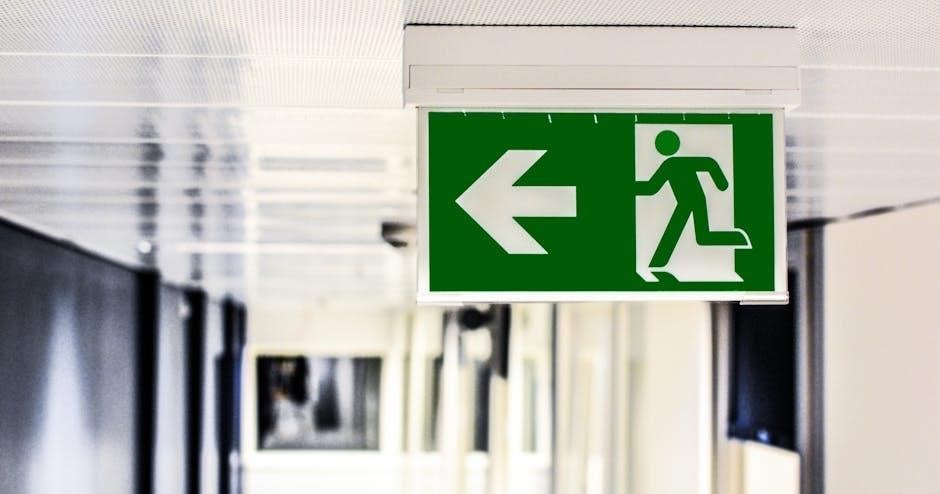
Manual fire alarm call points are integral components of fire safety systems, enabling quick activation in emergencies. They ensure timely alerts and safe evacuations, crucial for protecting lives and property in commercial and public spaces. Regular testing is essential to maintain reliability and compliance with fire safety regulations.
What Are Manual Fire Alarm Call Points?
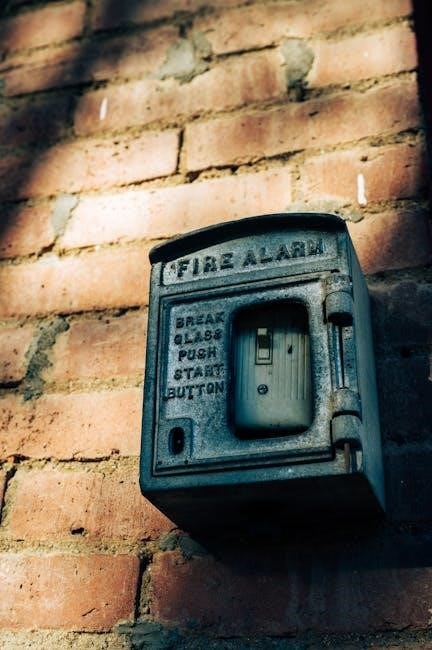
Manual fire alarm call points are devices installed in buildings to enable individuals to manually trigger a fire alarm in case of an emergency. These units typically consist of a lever, button, or breakable glass that, when activated, send a signal to the fire alarm control panel. They are usually red in color and clearly labeled for quick identification. Call points are essential for rapid response, ensuring safety and compliance with fire safety regulations. They are a critical component of both manual and hybrid fire alarm systems, providing a reliable means of alerting occupants to potential dangers.

The Importance of Regular Testing
Regular testing ensures fire alarm systems function reliably, identifies faults early, and maintains compliance with safety regulations, preventing potential failures and ensuring occupant safety during emergencies.
Why Regular Testing Is Crucial for Safety and Compliance
Regular testing of manual fire alarm call points is vital for ensuring system reliability and compliance with fire safety standards. It helps identify faults early, preventing potential failures during emergencies. Testing ensures all components function correctly, providing reliable alerts and protecting occupants. Compliance with regulations requires consistent testing, avoiding legal penalties and ensuring safety measures are up to standard. Regular checks also minimize disruptions and maintain trust in the fire safety system’s effectiveness.

Recommended Testing Frequency
Manual fire alarm call points should be tested weekly to ensure functionality and compliance. Testing frequency may vary based on building size and regulations, ensuring all points are checked over time. Regular checks help maintain safety and prevent system failures during emergencies. Consistency in testing is crucial for reliability and compliance with fire safety standards.
Weekly Testing Requirements
Weekly testing of manual fire alarm call points is essential to ensure system reliability. Activate a different call point each week to verify the alarm sounds and the control panel registers the signal. This rotation ensures all points are tested over time, especially in larger buildings. Weekly tests help identify faults early, ensuring timely repairs and maintaining compliance with safety standards. Consistency in testing is crucial for the safety of occupants and the overall functionality of the fire alarm system. Regular checks also minimize disruptions during emergencies by ensuring the system is always ready to respond.
Monthly Testing Checklist
A monthly test ensures the fire alarm system’s reliability and identifies potential issues. Activate all smoke and heat detectors, as well as manual call points, to confirm proper functionality. Inspect the control panel for faults or alarms and ensure all components communicate effectively. Document the test results, noting any discrepancies or repairs needed. This comprehensive check complements weekly tests, providing a deeper assessment of the system’s readiness and ensuring compliance with fire safety standards. Regular monthly testing helps maintain system integrity and user confidence.
Quarterly Testing Procedures
Quarterly testing is essential for a thorough evaluation of the fire alarm system. Test all manual call points to ensure they activate the alarm correctly. Inspect smoke and heat detectors for proper functionality and cleanliness. Check the control panel for any faults or alarms and verify that all components communicate seamlessly. This frequency helps identify potential issues before they escalate, ensuring the system remains reliable and compliant with safety regulations. Quarterly testing is a critical part of maintaining fire safety and protecting occupants effectively. Regular checks ensure the system operates flawlessly during emergencies, safeguarding lives and property.
Annual Testing and Inspection
Annual testing and inspection of manual fire alarm call points are mandatory for ensuring system reliability and compliance with fire safety standards. This comprehensive check involves testing all call points, detectors, and the control panel. Professionals inspect wiring, connections, and power supplies to identify and repair faults. Detectors are cleaned and recalibrated, and the entire system is verified for proper operation. Documentation of the inspection is essential for compliance and records. Annual inspections ensure the fire alarm system functions optimally, providing a high level of safety and meeting regulatory requirements effectively. This thorough process guarantees readiness for emergencies throughout the year.
Common Mistakes to Avoid
Common mistakes include not testing weekly, failing to rotate call points, and neglecting documentation. These oversights can lead to system inefficiencies and non-compliance with safety standards.
Not Testing Weekly
Failure to test manual fire alarm call points weekly is a critical oversight, potentially leading to undetected faults and system failures during emergencies. Weekly testing ensures all call points function correctly and are free from issues like dust, damage, or malfunctioning mechanisms. Neglecting this step can result in delayed alarms, compromising safety and compliance with fire safety regulations. It also increases the risk of false alarms or complete system failure when needed most. Consistent weekly testing is essential for maintaining reliable fire safety systems and protecting occupants effectively.
Failing to Rotate Call Points
Failing to rotate manual fire alarm call points during weekly testing can lead to uneven wear and tear, with some devices being overused while others remain untested for extended periods. This oversight may result in undetected faults in unused call points, potentially causing system failures during emergencies. Neglecting rotation also risks non-compliance with fire safety standards like BS 5839, which emphasize the importance of testing all call points regularly. Over time, this practice can compromise the reliability of the entire fire alarm system, leaving occupants vulnerable to undetected threats and increasing liability risks for building owners.
Not Documenting Tests
Not documenting manual fire alarm call point tests can lead to compliance issues and maintenance oversights. Without records, it becomes difficult to prove that tests were conducted, potentially resulting in legal penalties. Documentation also helps track testing patterns, ensuring accountability and identifying recurring faults. Failing to maintain logs can hinder troubleshooting and leave the system vulnerable to undetected issues. Proper documentation ensures clarity for future tests and supports compliance with fire safety regulations like BS 5839, making it a critical step in maintaining a reliable fire alarm system.

Step-by-Step Testing Process
Identify call points, use a test key, activate, verify alarm functionality, and reset the system to ensure proper operation and compliance with safety protocols.
Preparing for the Test
Before testing, review your fire alarm testing schedule to ensure compliance with local regulations. Document the test plan and notify building occupants to minimize disruptions. Check if any call points are faulty or tampered with, and ensure all areas of the building are accessible. Gather necessary tools, such as a test key or reset code, and confirm the fire alarm panel is in normal operation. This step ensures the test is conducted efficiently and safely, avoiding unnecessary alarms or system malfunctions during the process.
Activating the Call Point
Activating a manual fire alarm call point involves breaking the glass or using a test key to trigger the alarm. Once activated, ensure the alarm sounds and the fire alarm panel acknowledges the signal. This step verifies the call point’s functionality and connectivity to the system. Always follow the manufacturer’s instructions to avoid damaging the device. If the alarm does not activate, investigate and resolve the issue before proceeding. Proper activation ensures the system’s reliability in real emergencies and helps maintain compliance with fire safety standards. Regular testing confirms the system’s readiness to respond effectively.
Checking System Functionality
After activating the call point, verify the alarm sounds and the control panel displays the activation. Ensure all connected devices, like strobe lights and sirens, function correctly. Check that the signal is received by the panel and that there are no faults or errors. This step confirms the system’s ability to alert occupants and facilitate a timely response. Proper functionality ensures safety and compliance with fire regulations, providing peace of mind and reliable emergency response capabilities. Regular checks help maintain system integrity and responsiveness.
Resetting the System
After testing, reset the fire alarm system to ensure it returns to normal operation. Use the reset key or code provided for the control panel. Replace any broken glass or reset the call point mechanism according to the manufacturer’s instructions. Proper resetting prevents false alarms and ensures the system is ready for future activations. Failure to reset can lead to system malfunctions or false alerts, compromising safety and compliance. Always verify the system is fully operational after resetting to maintain reliability and preparedness for emergencies.

Maintenance and Inspection
Regular maintenance and inspections are crucial for ensuring fire alarm systems function properly. Visual checks, cleaning, and professional servicing help maintain reliability and compliance with safety standards.
Visual Inspections
Visual inspections of manual fire alarm call points are essential to ensure they remain functional and unobstructed. Check for damage, wear, and tear, and verify that all components, such as the glass or reset mechanisms, are intact. Ensure call points are clearly visible and accessible, with no obstructions blocking access or visibility. Look for signs of tampering or vandalism, and confirm that protective covers or plastic guards are in place if required. Regular visual checks help prevent issues before they escalate, ensuring the system’s readiness in emergencies.
Professional Servicing
Professional servicing of manual fire alarm call points is typically recommended annually to ensure optimal performance and compliance with safety standards. Certified technicians conduct thorough inspections, testing, and maintenance, addressing any wear and tear, electrical issues, or functionality concerns. This service includes checking wiring, connections, and internal mechanisms, as well as replacing damaged or worn-out parts. Regular professional servicing guarantees the system’s reliability, helping to prevent false alarms and ensuring rapid response during emergencies. It also provides documentation for compliance with local fire safety regulations and standards.

Regulatory Compliance and Best Practices
Adhering to fire safety standards like BS 5839 ensures compliance and reliability. Regular testing and maintenance are crucial for meeting regulatory requirements and ensuring system functionality.
Meeting Local Fire Safety Regulations
Local fire safety regulations mandate regular testing of manual call points to ensure system reliability. Weekly tests are typically required, with a rotation plan to cover all call points over time. This ensures compliance and early fault detection. Annual inspections by certified professionals are also necessary to maintain system integrity. Adherence to these standards ensures safety and avoids legal penalties, while contributing to a robust fire safety strategy for all premises.