Boiling a mouthguard is a common method to soften the thermoplastic material, allowing it to mold to your teeth for a customized fit and better protection during sports.
Preparation for Boiling
Gather a pot, water, a spoon, and cold water for cooling. Read the manufacturer’s instructions carefully to ensure proper preparation and safety before boiling the mouthguard.
Gathering Materials and Tools
To prepare for boiling your mouthguard, start by gathering the necessary materials and tools. You will need a small pot or kettle to boil water, a spoon or tongs to handle the mouthguard safely, and a source of cold water or ice for cooling it after boiling. Additionally, ensure you have the mouthguard itself, which should include any tethers or straps if applicable. Having a timer or stopwatch is also crucial to monitor the boiling time accurately. It’s important to have all these items ready before you begin the process to avoid any delays or mishaps. Proper preparation ensures the boiling and fitting process goes smoothly and safely. Always double-check that you have everything needed before proceeding to the next step.
Reading Manufacturer Instructions
Before boiling your mouthguard, it is essential to thoroughly read and follow the manufacturer’s instructions. Each mouthguard may have specific guidelines tailored to its material and design. Pay close attention to recommended boiling times, which typically range between 30 seconds to 2 minutes, depending on the type of mouthguard. Some models may require soaking in cold water after boiling, while others may specify not to exceed certain time limits to avoid damage. Additionally, instructions may include tips for handling the mouthguard, such as using tongs or a spoon to prevent burns. For mouthguards with straps or attachments, special steps might be necessary to ensure proper fitting. Failure to follow these instructions can result in an improper fit, reduced protection, or even damage to the mouthguard. Always prioritize the manufacturer’s advice to achieve the best results for your safety and comfort. This step ensures a safe and effective customization process;
Boiling Process
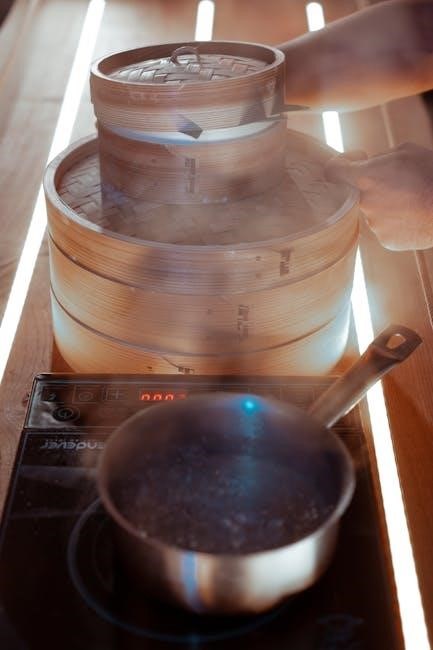
Bring water to a boil, submerge the mouthguard for 30-60 seconds, then carefully remove it with tongs or a spoon to avoid burns, ensuring it’s soft and ready for shaping.
Submerging the Mouthguard in Boiling Water
Once the water is boiling, carefully place the mouthguard into the pot using tongs or a spoon to avoid direct contact with the hot water. Ensure the mouthguard is fully submerged to allow even softening of the thermoplastic material. Depending on the manufacturer’s instructions, submerge the mouthguard for 30 to 60 seconds. Do not exceed the recommended time, as overheating can cause the material to become too soft or misshapen. Keep a timer handy to monitor the duration accurately. After submerging, turn off the heat and prepare to remove the mouthguard. Use caution, as the water and mouthguard will be extremely hot. Proper submersion ensures the mouthguard softens adequately for a precise fit during the molding process. Avoid stirring the mouthguard during this step, as it may deform. Once the time is up, carefully lift it out with your utensil and proceed to the cooling phase.
Timing the Boiling Process
Timing is crucial when boiling a mouthguard to ensure proper softening without overheating. Most manufacturers recommend submerging the mouthguard in boiling water for 30 to 60 seconds. Start timing as soon as the mouthguard is fully submerged. Use a stopwatch or timer to monitor the duration accurately. Overheating can cause the thermoplastic material to become too soft, leading to a misshapen fit. Conversely, insufficient time may result in a mouthguard that is not pliable enough to mold properly. After the recommended time, immediately remove the mouthguard from the water with tongs or a slotted spoon to prevent further softening. Be cautious, as the mouthguard will be very hot. Proper timing ensures the material reaches the optimal consistency for shaping. Once removed, quickly proceed to the cooling and fitting phase to achieve a secure and comfortable fit.
Fitting the Mouthguard
Fitting the mouthguard involves cooling it slightly after boiling, placing it in the mouth, and biting down gently to shape it around the teeth. Proper alignment ensures comfort and protection.
Cooling the Mouthguard After Boiling
After boiling, carefully remove the mouthguard from the water using a spoon or tongs. Immediately place it under cold running water or submerge it in an ice bath to stop the cooking process. This step is crucial to prevent the mouthguard from becoming too hard or misshapen. Allow it to cool for about 10-15 seconds until it retains its shape but is still pliable enough to mold. Be cautious, as the mouthguard may still be hot. Proper cooling ensures the material remains soft for the fitting process. Once cooled slightly, proceed to shape it in your mouth for a secure and comfortable fit. Avoid letting it cool completely, as it will harden and lose its moldability.
Shaping the Mouthguard in the Mouth
Once the mouthguard has cooled slightly but is still pliable, carefully place it into your mouth, ensuring it covers all your teeth. Gently bite down to press the mouthguard firmly against your teeth and gums. Use your fingers to mold the edges around your mouth for a snug fit. Hold this position for about 10-30 seconds to allow the material to shape to your dental structure. Some people also suck in gently to create a vacuum, which helps the mouthguard adhere closely to the teeth. After shaping, remove the mouthguard and check the fit in a mirror. If necessary, repeat the process for adjustments. Proper shaping ensures comfort, protection, and optimal performance during sports. Avoid moving the mouthguard while it’s setting to maintain accuracy in the mold.
Care and Maintenance
Regularly clean your mouthguard with mild soap and water, and store it in a protective case to prevent damage. Avoid exposure to extreme temperatures and replace it if worn or damaged.
Cleaning the Mouthguard
Cleaning your mouthguard is essential for maintaining hygiene and longevity. Use mild soap and cold water to gently scrub the surface with a soft toothbrush. Avoid harsh chemicals or hot water, as they may damage the material. Rinse thoroughly and pat dry with a clean cloth. For deep cleaning, mix equal parts water and white vinegar, soak the mouthguard for 10 minutes, then rinse. Regular cleaning prevents bacteria buildup and odors. Store the mouthguard in a ventilated case to ensure it dries completely. Avoid chewing or bending the mouthguard, as this can cause permanent damage. Clean your mouthguard after each use to maintain its shape and effectiveness. Regular inspection for wear or tear is also recommended to ensure proper protection during sports activities.
Storing the Mouthguard Properly
Proper storage is crucial to maintain the shape and hygiene of your mouthguard. After cleaning, store it in a protective, ventilated case to prevent moisture buildup and bacterial growth. Avoid exposure to extreme temperatures, such as leaving it in a hot car, as this can warp the material. Do not bend or fold the mouthguard, as this may cause permanent damage. Keep it away from pets or children to prevent accidental damage. Store the mouthguard in a dry, cool place to ensure it retains its shape and remains effective for future use. Regularly inspect the case for cleanliness and replace it if necessary. Proper storage extends the lifespan of your mouthguard and ensures it continues to provide adequate protection during sports activities.
Types of Mouthguards
Mouthguards are primarily available in two types: boil-and-bite and custom. Boil-and-bite mouthguards are made from thermoplastic material that softens when boiled, allowing for a custom fit. Custom mouthguards are tailored to individual teeth impressions for maximum comfort and protection.
Boil-and-Bite Mouthguards
Boil-and-bite mouthguards are the most popular choice among athletes due to their affordability and ease of use. These mouthguards are made from thermoplastic material that softens when submerged in boiling water, allowing them to mold to the user’s teeth for a personalized fit. The process involves boiling the mouthguard for 30 to 60 seconds, then carefully placing it in the mouth and biting down to shape it. This method provides a snug and protective fit, enhancing comfort and performance during sports activities. Proper boiling and shaping are essential to ensure the mouthguard offers adequate protection without causing discomfort. It’s important to follow the manufacturer’s instructions precisely to achieve the best results and maintain the mouthguard’s durability. Regular cleaning and proper storage are also recommended to extend its lifespan and hygiene. Boil-and-bite mouthguards are a practical solution for those seeking effective, customizable protection.
Custom Mouthguards
Custom mouthguards are tailored to fit an individual’s teeth perfectly, offering superior protection and comfort compared to boil-and-bite options. These are typically created by dentists using impressions of the user’s mouth, ensuring a precise and comfortable fit. Unlike boil-and-bite mouthguards, custom models are not made from thermoplastic materials that require boiling. Instead, they are crafted from durable materials like ethylene vinyl acetate (EVA), which provide excellent shock absorption and long-lasting protection. Custom mouthguards are highly recommended for athletes with braces or specific dental needs, as they can be designed to accommodate these factors. While they are more expensive than boil-and-bite options, their superior fit and durability make them a worthwhile investment for serious athletes. Proper care, including regular cleaning and storage, is essential to maintain their quality and extend their lifespan. Custom mouthguards are the gold standard for mouth protection in sports, combining comfort, customization, and exceptional performance.
Leave a Reply
You must be logged in to post a comment.