Month: January 2025 (Page 1 of 2)

grand princess deck plan pdf

Discover the Grand Princess cruise ship layout with the official deck plan PDF, featuring cabin locations, dining venues, entertainment options, and public areas for seamless cruise planning.

Overview of the Grand Princess Cruise Ship

The Grand Princess, launched in 1998, is a renowned cruise ship offering luxurious voyages. With a guest capacity of 2,600, it features 1,301 cabins across 16 decks. The ship underwent significant renovations in 2019, enhancing dining and entertainment options. Known for its Movies Under the Stars screen and The Sanctuary adult retreat, it provides a blend of relaxation and vibrant activities, ensuring unforgettable cruising experiences for all passengers.

Importance of Deck Plans for Cruise Planning

Deck plans are essential for planning a seamless cruise experience. They provide detailed layouts of all 16 decks, highlighting cabin locations, public venues, pools, spas, and entertainment options. Passengers can identify nearby amenities, plan activities, and make informed decisions about dining and entertainment. This helps maximize onboard comfort and ensures a well-organized, enjoyable journey aboard the Grand Princess.

Key Features of the Grand Princess Deck Plan

The Grand Princess deck plan highlights 16 passenger decks, featuring diverse amenities like pools, spas, dining venues, entertainment options, and various cabin categories for all preferences.

Deck Layout and Public Venues

The Grand Princess features a well-organized deck layout with 16 passenger decks, offering a variety of public venues. Deck 7, the Promenade, boasts dining and entertainment options, while Deck 14, the Lido Deck, focuses on poolside relaxation. Public areas include theaters, lounges, and wellness centers, ensuring a diverse cruise experience. The deck plan provides detailed layouts of pools, spas, and recreational activities, helping passengers navigate effortlessly.

Types of Cabins and Their Locations

The Grand Princess offers a variety of cabin categories, including interior, oceanview, and balcony staterooms, each strategically located across multiple decks. Suites and premium accommodations provide enhanced amenities for a luxurious stay. Accessible cabins are also available, ensuring comfort for all passengers. The deck plan PDF highlights the placement of each cabin type, helping travelers choose the perfect stateroom based on their preferences and needs.

Swimming Pools, Spas, and Entertainment Options

The Grand Princess features multiple swimming pools, including the Lido Deck pool for relaxation and the Splash Pool for family fun. The spa offers luxurious treatments, while entertainment options like Movies Under the Stars and The Sanctuary provide diverse leisure experiences. Deck plans highlight these amenities, ensuring passengers can easily locate their preferred spots for relaxation and enjoyment during their voyage.

Deck Highlights

Explore the Grand Princess’ standout decks, including Promenade Deck 7 for dining and entertainment, Lido Deck 14 for poolside relaxation, and Sports Deck 16 with recreational activities and The Sanctuary.

Promenade Deck (Deck 7) ⎯ Dining and Entertainment

Promenade Deck 7 is a vibrant hub offering exceptional dining and entertainment. Savor dishes at Alfredo’s Pizzeria, Salty Dog Grill, and Coffee & Cones. Enjoy live music, trivia, and comedy shows in the lounges. Stroll through duty-free shops or relax with a drink at the bar. This deck seamlessly blends relaxation and excitement, making it a focal point for onboard experiences.

Lido Deck (Deck 14) ⎯ Poolside Relaxation

Lido Deck 14 offers a tranquil retreat with its sparkling pools, whirlpool tubs, and sun-kissed loungers. Enjoy casual dining at Alfredo’s Pizzeria or grab a snack at the nearby eateries. Relax with a refreshing drink or take in the view of the horizon. The deck also features the popular Movies Under the Stars screen, perfect for evening entertainment under the sky.

Sports Deck (Deck 16) ⎯ Recreational Activities

The Sports Deck (Deck 16) is a hub for active cruisers, featuring a full sports court for basketball, tennis, and other games. Guests can also enjoy shuffleboard and a giant chess set for casual fun. The deck includes the Oasis Bar, offering refreshing drinks, and the Platinum Studio for entertainment. With its recreational offerings, Deck 16 provides a lively space for all ages to stay active and entertained at sea.

Public Venues and Amenities

Explore the Grand Princess’s public venues and amenities, offering a wide range of activities and services to enhance your cruise experience, including pools, spas, dining options, entertainment facilities, and wellness centers.

Dining Options ⎯ Restaurants and Bars

The Grand Princess offers diverse dining options, including Alfredo’s Pizzeria, Salty Dog Grill, and Coffee & Cones, added in 2019. Savor Italian cuisine at Sabatini’s, gourmet burgers at The Salty Dog, or premium steaks at Crown Grill. International buffets and specialty restaurants cater to all tastes. Bars like the Oasis Bar and Wheelhouse Bar provide refreshing cocktails, ensuring a vibrant dining and relaxation experience onboard.

Entertainment Facilities ⸺ Theaters and Lounges

Grand Princess features state-of-the-art entertainment venues, including the Princess Theater for Broadway-style shows and live performances. The Vista Lounge hosts comedy acts and musical entertainers, while the Wheelhouse Bar offers a cozy setting for live music and cocktails. Additional options like the Skywalkers Nightclub provide late-night dancing, ensuring diverse entertainment choices for all passengers throughout their journey.

Wellness and Fitness ⸺ Spa, Gym, and Wellness Center

Grand Princess offers a serene wellness experience at the Lotus Spa, featuring massages, facials, and other treatments. The fitness center is equipped with modern equipment and offers yoga, Pilates, and spinning classes. Additionally, the ship provides wellness programs, seminars, and a jogging track. The adults-only Sanctuary retreat and sports deck activities further enhance the wellness options, ensuring a rejuvenating experience for all passengers.

Cabin Categories and Locations

Grand Princess offers a variety of cabin categories, including interior, oceanview, and balcony staterooms, with locations spread across multiple decks to suit different preferences and budgets.

Interior, Oceanview, and Balcony Staterooms

Interior staterooms offer budget-friendly comfort, while oceanview rooms provide scenic vistas. Balcony staterooms feature private verandas for ultimate relaxation. Each category varies in size and amenities, with options to suit diverse traveler preferences. Deck locations range from lower levels to higher decks, offering different perspectives of the ocean. Perfect for solo travelers, couples, or families, these staterooms ensure a memorable voyage.

Suites and Premium Accommodations

Suites on the Grand Princess offer luxurious living with spacious balconies, separate living areas, and upscale amenities. Premium accommodations feature marble bathrooms, concierge services, and exclusive access to shipboard perks. Located on higher decks, these suites provide breathtaking ocean views and personalized service, ensuring a lavish and memorable cruise experience tailored to discerning travelers seeking elegance and comfort at sea.

Accessible Cabins and Special Features

Grand Princess offers accessible cabins designed for guests with mobility needs, featuring wider doorways, roll-in showers, and grab bars. These staterooms are strategically located on decks like Emerald and Dolphin for easy access to public areas. Select accessible cabins accommodate rollaways, with configurations to suit families or additional guests, ensuring a comfortable and inclusive cruise experience for all travelers.

Recent Renovations and Updates

Grand Princess underwent a 2019 renovation, introducing new top-deck dining venues like Alfredo’s Pizzeria and Salty Dog Grill, enhancing the passenger experience.

New Dining Venues Added in 2019 Renovation

The 2019 renovation introduced new dining options, including Alfredo’s Pizzeria, Salty Dog Grill, and Coffee & Cones. These venues offer fresh, handcrafted pizzas, gourmet burgers, and specialty coffee with ice cream, enhancing the ship’s culinary offerings and providing passengers with diverse dining experiences tailored to various tastes and preferences.

Enhanced Entertainment and Leisure Facilities

The 2019 renovation enhanced entertainment options with the addition of the Movies Under the Stars screen, offering poolside films. The Sanctuary, an adult-only retreat, provides a serene escape. These updates ensure passengers enjoy a mix of relaxation and entertainment, with modern amenities designed to cater to diverse preferences for a memorable cruise experience.

Special Features of the Grand Princess

Experience the unique charm of the Grand Princess with its iconic Movies Under the Stars screen and The Sanctuary, an exclusive adult-only retreat, perfect for relaxation and entertainment.

Movies Under the Stars Screen

The Grand Princess features an iconic Movies Under the Stars screen, offering outdoor cinema experiences under the night sky. Located on the upper decks, it provides a unique setting for movie nights, often accompanied by themed events and snacks. This popular venue is a highlight for many passengers, blending entertainment with the beauty of the ocean surroundings.

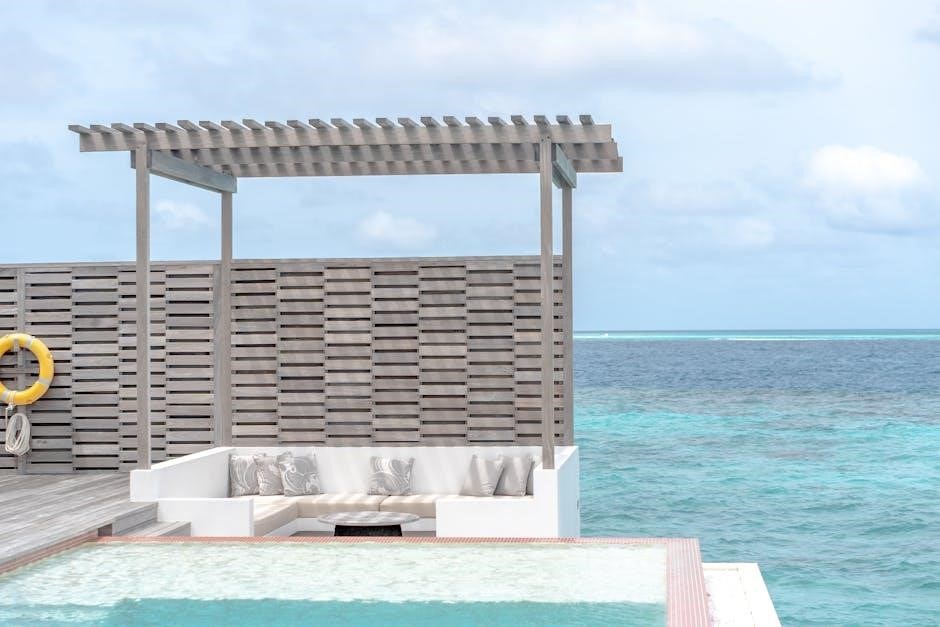
The Sanctuary ⎯ Adult-Only Retreat

The Sanctuary is a serene, adult-only retreat offering a peaceful escape from the ship’s lively atmosphere. Located on an upper deck, it features plush lounge chairs, shaded areas, and stunning ocean views. Guests can enjoy light bites, refreshing drinks, and attentive service in a tranquil setting, perfect for relaxation and privacy. It’s an ideal spot to unwind and recharge during your Grand Princess cruise.

Wedding Chapel and Event Spaces

The Grand Princess features a dedicated wedding chapel, perfect for intimate ceremonies at sea. The One5 wedding chapel offers elegant decor and stunning ocean views, creating a romantic setting for exchanging vows. Additional event spaces are available for receptions and gatherings, ensuring a memorable celebration. The ship’s event facilities cater to both small and large groups, providing a seamless experience for special occasions.

Planning Your Cruise with the Deck Plan

Utilize the Grand Princess deck plan PDF to explore ship layouts, plan activities, and choose the perfect cabin. Maximize your onboard experience with detailed insights.

How to Choose the Best Cabin Location

Selecting the ideal cabin on the Grand Princess involves considering factors like proximity to amenities, noise levels, and views. Cabins near elevators offer convenience, while those mid-ship minimize motion. Balcony staterooms provide ocean views, and suites offer luxury. Use the deck plan PDF to evaluate locations and choose a cabin that suits your preferences for a comfortable and enjoyable voyage.

Maximizing Your Onboard Experience

Plan ahead using the Grand Princess deck plan PDF to explore dining, entertainment, and wellness options. Book shore excursions early, indulge in poolside relaxation, and enjoy Movies Under the Stars. Take advantage of spa treatments, fitness classes, and vibrant nightlife. Stay connected with family and friends through the ship’s app. Make the most of your time aboard the Grand Princess for an unforgettable voyage.

Technical Specifications and Stats

Grand Princess measures 949 feet in length with a gross tonnage of 107,517, accommodating 2,600 guests. Inaugurated in 1998, it offers a space ratio of 34 gross tons per passenger, ensuring comfort and luxury at sea.

Guest Capacity, Length, and Gross Tonnage

Grand Princess accommodates 2,600 guests, with a total length of 949 feet and a gross tonnage of 107,517. Its size ensures ample space for amenities while maintaining passenger comfort. The ship’s dimensions and capacity make it an ideal choice for both relaxation and entertainment. This information is crucial for understanding the scale of the vessel and planning your cruise experience effectively.

Space Ratio and Passenger Comfort

Grand Princess offers a space ratio of 34 gross tons per passenger, ensuring ample room for comfort. With 13 publicly accessible decks and 8 cabin decks, the ship balances public areas and private quarters. Spacious cabins and well-distributed amenities enhance the cruising experience, providing a relaxed atmosphere for all guests, including those with accessibility needs, ensuring a stress-free and enjoyable journey at sea.

Downloading the Grand Princess Deck Plan PDF

Download the official Grand Princess deck plan PDF from Princess Cruises or trusted sources like CruiseMapper for detailed cabin layouts, amenities, and public venue locations to plan your cruise seamlessly.

Official Sources for the Latest Deck Plans

Access the most accurate and updated Grand Princess deck plans through Princess Cruises’ official website or trusted platforms like CruiseMapper. These sources provide detailed PDFs, ensuring you have the latest layouts, cabin locations, and public venue information to plan your cruise effectively. Always verify from official channels to avoid outdated or incorrect deck plan details.

Using the PDF for Cruise Preparation

The Grand Princess deck plan PDF is an essential tool for cruise preparation. It provides detailed layouts of all decks, highlighting cabin locations, dining venues, pools, entertainment options, and wellness facilities. Use it to familiarize yourself with the ship, plan activities, and book the best cabin for your needs. This guide ensures a seamless and enjoyable cruising experience, helping you make the most of your time onboard.

Contact Information for Further Assistance

For inquiries or assistance, contact Princess Cruises at 1-800-PRINCESS or visit their official website. Travel agents and customer service teams are available to help with deck plans and bookings;

Princess Cruises Customer Service

Princess Cruises offers dedicated customer support to assist with deck plan inquiries, bookings, and special requests. Call 1-800-PRINCESS or visit their official website for personalized help. Their team ensures seamless cruise planning, addressing questions about cabin locations, amenities, and accessibility. Whether you need details on staterooms or dining options, Princess Cruises’ customer service provides comprehensive support for a hassle-free experience.

Travel Agent Resources and Support

Travel agents can access comprehensive resources, including detailed deck plans and cabin layouts, to help clients plan their Grand Princess cruise. Princess Cruises provides dedicated support through their official website, offering downloadable PDFs and interactive tools. Agents can utilize these resources to assist with cabin selection, dining reservations, and activity planning, ensuring a personalized and seamless experience for their clients.

meet my brothers novel pdf free download

Written by Red Thirteen‚ Meet My Brothers follows Mia Bowen‚ who accidentally marries into a wealthy family. Discovering pregnancy‚ she faces a divorce agreement‚ exploring themes of family dynamics and resilience in a gripping romance.

Background and Plot Summary

Meet My Brothers‚ authored by Red Thirteen‚ delves into the life of Mia Bowen‚ a young woman who accidentally marries the heir of a wealthy family. The story unfolds as Mia navigates her unexpected marriage‚ pregnancy‚ and the subsequent challenges of family dynamics. On discovering her pregnancy‚ Mia is met with a divorce agreement‚ throwing her into a whirlwind of emotional turmoil and self-discovery. The novel explores themes of resilience‚ love‚ and the complexities of familial relationships‚ set against the backdrop of an affluent yet dysfunctional family. With 1‚886 chapters‚ the story intricately weaves romance‚ drama‚ and personal growth‚ making it a captivating read for fans of contemporary romance and family dramas.

Author and Genre Overview

Meet My Brothers is penned by the talented author Red Thirteen‚ known for crafting compelling narratives in the romance and drama genres. This novel falls under the categories of contemporary romance‚ family drama‚ and emotional fiction‚ appealing to readers who enjoy stories rich in character development and relational dynamics. Red Thirteen’s writing style is praised for its emotional depth‚ vivid storytelling‚ and ability to explore complex themes such as marriage‚ pregnancy‚ and self-discovery. The novel’s genre blends elements of romance‚ drama‚ and family-centric narratives‚ making it a favorite among fans of heartfelt and thought-provoking literature. With 1‚886 chapters‚ the book offers an extensive and immersive reading experience.

Key Themes in “Meet My Brothers”

The novel explores themes of family dynamics‚ marriage‚ pregnancy‚ and self-discovery‚ blending emotional resilience with the power of love‚ creating a deeply engaging and relatable story.

Family Dynamics and Relationships

In Meet My Brothers‚ family dynamics are central‚ exploring intricate relationships within a wealthy household. Mia’s marriage into an affluent family introduces her to a complex web of sibling rivalries and a disapproving mother-in-law. As she navigates these relationships‚ the novel delves into themes of loyalty‚ betrayal‚ and acceptance. The characters’ interactions reveal the challenges of fitting into a new family structure‚ highlighting the emotional strains and unexpected bonds that form. Through these dynamics‚ the story illustrates how family ties can both support and suffocate‚ offering a nuanced portrayal of love and conflict within a tight-knit yet dysfunctional family setting.

Marriage‚ Pregnancy‚ and Self-Discovery

Mia Bowen’s journey in Meet My Brothers is deeply intertwined with her unexpected marriage‚ pregnancy‚ and the ensuing quest for self-discovery. After accidentally marrying the heir of a wealthy family‚ Mia’s life is upended when she discovers she is pregnant‚ only to be handed divorce papers. This pivotal moment forces her to confront her identity‚ resilience‚ and future. The novel explores how these life-altering events shape her perspective‚ pushing her to redefine her sense of self. Through her struggles and growth‚ the story highlights the transformative power of adversity‚ offering a compelling exploration of love‚ loss‚ and personal evolution.

Availability of “Meet My Brothers” Novel

The novel is available for free PDF download or online reading through various platforms‚ with popular sites offering frequent chapter updates.

Free PDF Download Options

Readers can download the Meet My Brothers novel in PDF format for free through various online platforms. Websites like findnovel.net and AllNoveljr offer complete chapters‚ updated regularly. Additionally‚ platforms such as ReadNovelFull provide direct links for downloading the novel‚ ensuring easy access. The PDF version allows readers to enjoy the story offline‚ making it convenient for those who prefer reading on-the-go. With multiple sources available‚ fans of the novel can choose their preferred method to download and read Meet My Brothers without any cost. This accessibility has contributed to the novel’s growing popularity among readers worldwide.

Online Reading Platforms

Meet My Brothers is widely available for online reading across various platforms. Websites such as ReadNovelFull and AllNoveljr offer free access to the novel‚ with chapters updated regularly. Readers can enjoy the story directly in their browsers without needing to download a PDF; These platforms provide a seamless reading experience‚ allowing fans to follow Mia Bowen’s journey through marriage‚ pregnancy‚ and self-discovery. Online reading options are particularly convenient for those who prefer not to download files‚ ensuring easy access to the novel anytime‚ anywhere. This accessibility has made Meet My Brothers a favorite among readers seeking engaging romance and drama stories online.

Reading “Meet My Brothers” Online

Meet My Brothers is accessible on popular platforms like ReadNovelFull and AllNoveljr‚ offering free online reading. Chapters are regularly updated‚ allowing readers to follow Mia Bowen’s journey seamlessly. The novel’s engaging storyline and dynamic characters make it a favorite among romance and drama enthusiasts. Online access ensures convenience‚ enabling readers to enjoy the book anytime without downloading a PDF. This ease of access has contributed to its popularity‚ making it a must-read for fans of contemporary romance and family drama.

Popular Websites for Free Access

Several platforms offer free access to Meet My Brothers‚ including ReadNovelFull‚ AllNoveljr‚ and India’s Best Dancer. These websites provide complete chapters and regular updates‚ ensuring readers can follow Mia Bowen’s journey without interruption. Additionally‚ sites like nisfree.com and findnovel.net host the novel‚ catering to fans of romance and drama. These platforms are user-friendly‚ with easy navigation and no requirement for downloads. Readers can enjoy the story online‚ making it accessible to a global audience. The availability of free access has significantly contributed to the novel’s popularity‚ allowing readers to immerse themselves in its compelling narrative without cost.

Chapter Updates and Availability

Meet My Brothers is widely available‚ with chapters regularly updated on platforms like ReadNovelFull and AllNoveljr. Specific chapters‚ such as 41-50 and 51-60‚ can be downloaded as free PDFs or read online. The novel’s latest chapters‚ including Chapter 477‚ are accessible on these sites‚ ensuring fans stay engaged. Some platforms require creating a free account to access content‚ while others offer direct links. The frequent updates and easy accessibility make it convenient for readers to follow Mia Bowen’s journey. This availability has contributed to the novel’s popularity‚ allowing fans to enjoy its twists and turns without interruption. The free access ensures a broad audience can experience the story’s emotional depth and compelling narrative.

Reader Reviews and Feedback

Readers acclaim Meet My Brothers for its emotional depth‚ vivid characters‚ and engaging storyline‚ making it a top choice for fans of romance and drama‚ available free online.

General Reception and Ratings

Readers have widely praised Meet My Brothers for its emotional depth and compelling narrative. Many highlight its ability to weave intricate family dynamics with themes of resilience and love. The novel’s relatable characters and engaging plot have garnered high ratings‚ making it a favorite among romance and drama enthusiasts. Fans appreciate its vivid storytelling‚ which keeps them invested in Mia’s journey. The free availability of the novel online has further boosted its popularity‚ attracting a diverse audience. Overall‚ the positive feedback underscores its appeal as a must-read for those who enjoy heartfelt and thought-provoking stories.

Highlighted Comments from Readers

Readers have shared glowing feedback about Meet My Brothers‚ praising its emotional depth and relatable characters. One reader noted‚ “Mia’s journey is both heartbreaking and inspiring‚ making it impossible to put down.” Another commented‚ “The intricate family dynamics and unexpected twists kept me hooked from start to finish.” Many appreciate the novel’s ability to balance romance with real-life struggles‚ creating a story that resonates deeply. Others highlighted the free PDF availability‚ expressing gratitude for the accessibility of such a captivating read. Overall‚ the comments reflect a strong connection to the novel’s themes and characters‚ solidifying its place as a beloved story among readers.

Meet My Brothers captivates readers with its emotional journey‚ weaving family dynamics and personal growth into a compelling narrative. Its availability as a free PDF ensures accessibility for all.

Final Thoughts on the Novel

Meet My Brothers is a stirring tale of love‚ family‚ and resilience‚ crafted by Red Thirteen. The novel captivates with its intricate plot‚ delving into themes of marriage‚ pregnancy‚ and self-discovery. Mia Bowen’s journey‚ marked by unforeseen challenges and emotional depth‚ resonates deeply with readers. The story’s ability to weave drama and romance seamlessly ensures a compelling narrative. Its availability as a free PDF download has made it accessible to a wide audience‚ further enhancing its popularity. Readers praise its vivid characters and heartfelt storytelling‚ making it a standout in the romance genre. This novel is a must-read for those who enjoy emotional journeys and family dynamics.

Recommendations for Future Readers

Meet My Brothers is a must-read for fans of emotional journeys and family-centric stories. Its blend of romance‚ drama‚ and self-discovery makes it appealing to those who enjoy character-driven narratives. The novel’s exploration of complex relationships and real-life issues resonates deeply‚ offering a relatable and engaging experience. For readers seeking a story that balances heartache with hope‚ this book delivers. Its availability as a free PDF download adds to its accessibility‚ making it an excellent choice for anyone looking to immerse themselves in a captivating tale without cost. Dive into Mia’s world and discover the power of love and resilience in this unforgettable read.

mahalakshmi ashtakam pdf

The Mahalakshmi Ashtakam is a sacred hymn dedicated to Goddess Lakshmi, comprising eight verses that extol her divine attributes and blessings. Originating from the Padma Purana, it is chanted by Lord Indra to seek her grace. This prayer is a powerful invocation for wealth, prosperity, and spiritual growth, making it a popular choice among devotees. Its structured composition and profound meanings have made it a cherished text for those seeking divine blessings.

Overview of the Hymn

The Mahalakshmi Ashtakam is a devotional prayer dedicated to Goddess Lakshmi, consisting of eight verses that celebrate her divine attributes. It is a meditation on her role as the embodiment of wealth, prosperity, and spiritual enlightenment. The hymn, sourced from the Padma Purana, highlights her power to remove sins, grant desires, and bestow wisdom. Its verses are structured to evoke her blessings, making it a powerful tool for spiritual growth and material well-being. Chanting this hymn is believed to bring peace, prosperity, and divine grace.

Significance in Hindu Devotion

The Mahalakshmi Ashtakam holds profound significance in Hindu devotion as a powerful prayer to invoke Goddess Lakshmi’s blessings. It is chanted to seek prosperity, wealth, and spiritual enlightenment. Devotees believe that reciting this hymn with devotion removes sins, fulfills desires, and brings peace; It is often recited during auspicious occasions like Diwali and Lakshmi Puja, symbolizing the divine mother’s grace and protection. The hymn’s verses resonate deeply in Hindu spirituality, making it a cherished text for those seeking divine favor and harmony in life.

Structure and Composition

The Mahalakshmi Ashtakam is an eight-verse hymn dedicated to Goddess Lakshmi, each verse glorifying her distinct attributes. Composed in simple yet profound Sanskrit, it originates from the Padma Purana and was recited by Lord Indra. The hymn’s structure intricately weaves themes of sin removal, desire fulfillment, and the goddess’s eternal essence, making it a structurally elegant and spiritually rich composition cherished by devotees seeking divine grace.

Historical Background

The Mahalakshmi Ashtakam originates from the Padma Purana and is attributed to Lord Indra, who chanted it to appease Goddess Lakshmi. This ancient hymn, written in Sanskrit, has been a cornerstone of devotional practices for centuries, reflecting the deep reverence for Lakshmi in Hindu tradition. Its historical significance lies in its enduring use in rituals and ceremonies to invoke her blessings for prosperity and spiritual growth.

Origin of the Hymn

The Mahalakshmi Ashtakam originates from the sacred Padma Purana, an ancient Hindu scripture. This devotional hymn is attributed to Lord Indra, who composed it to praise Goddess Lakshmi and seek her divine grace. The hymn is structured as eight verses, each extolling a unique aspect of Mahalakshmi, making it a significant part of Hindu devotional practices. Its roots in ancient scripture and its enduring popularity underscore its spiritual and cultural importance.

Lord Indra’s Role in the Ashtakam

The Mahalakshmi Ashtakam is deeply associated with Lord Indra, who is said to have chanted it in devotion to Goddess Lakshmi. According to the Padma Purana, Indra composed this hymn to seek her divine grace and forgiveness. His devotion reflects the profound reverence for Mahalakshmi, emphasizing her role as the granter of prosperity and remover of obstacles. This sacred chant, attributed to Indra, underscores the hymn’s significance and its enduring appeal in Hindu worship.

Source from the Padma Purana

The Mahalakshmi Ashtakam is sourced from the revered Padma Purana, a prominent Hindu scripture. This sacred text narrates the hymn’s origin, describing how Lord Indra composed it to appease Goddess Lakshmi. The verses highlight her divine attributes, such as bestowing wealth and alleviating suffering, solidifying her role as a protector and provider. The Padma Purana adds spiritual weight to the Ashtakam, making it a cherished prayer for devotees seeking prosperity and divine grace.

Key Verses and Their Meanings

The Mahalakshmi Ashtakam comprises eight verses, each glorifying Goddess Lakshmi’s divine attributes. The verses describe her as the remover of sins, granter of success, and eternal supreme power, emphasizing her role as the universe’s protector and mother. Chanting these verses is believed to bring spiritual and material prosperity, fulfilling desires and alleviating suffering.

Verse 1: Salutations to Mahamaya

The first verse, “Namastestu mahamaye shree peete surapoojite,” is an invocation of Goddess Lakshmi as Mahamaya, the Great Enchantress. It describes her divine presence in Sri Pitha, her celestial abode, where she is worshipped by the Devas. This verse sets the tone for the hymn, expressing deep reverence and seeking her blessings. Reciting it is believed to connect devotees with her divine energy, bringing grace and prosperity into their lives. Its significance lies in its ability to evoke her benevolent presence.

Verse 2: The Remover of Sins and Sorrows

The second verse, “Namaste Garudaruhe,” portrays Goddess Lakshmi as a fierce protector and remover of sins. Mounted on Garuda, she is depicted as terrifying to demons and a savior for her devotees. This verse emphasizes her role in eradicating suffering and ignorance, offering solace to those seeking refuge. Chanting it is believed to purify the soul and alleviate mental and physical afflictions, reinforcing her compassionate and powerful nature. It’s a beacon of hope for those overwhelmed by adversity.

Verse 3: The Giver of Success and Intelligence

In the third verse, “Sarvagnye Sarvavarade,” Goddess Lakshmi is revered as the embodiment of omniscience and the granter of all boons. This verse highlights her role in bestowing success, intelligence, and wisdom upon her devotees. It underscores her ability to dispel ignorance and guide individuals toward their goals. Chanting this verse is believed to enhance mental clarity and grant the intellect needed to achieve success in both spiritual and worldly pursuits, making it a popular choice for students and professionals alike.

Verse 4: The Eternal and Supreme Power

The fourth verse, “Nitye Nityarthasakti”, praises Goddess Lakshmi as the eternal and supreme power, beyond the cycles of time. She is described as the ultimate reality, without beginning or end, and the mother of the universe. This verse emphasizes her role in sustaining creation and granting liberation. It also highlights her ability to destroy sins and sorrows, offering devotees spiritual and material prosperity. Chanting this verse is believed to connect one with her eternal essence, fostering a deeper understanding of her divine power. Her timeless presence is revered as the source of all existence and bliss, making her the supreme refuge for her devotees. This verse is particularly significant for those seeking enlightenment and eternal peace, as it encapsulates her role as the sustainer and protector of the cosmos, ensuring the well-being of all beings. By invoking her eternal power, devotees aim to transcend worldly limitations and attain spiritual harmony. The verse serves as a reminder of her unwavering presence in every aspect of life, guiding followers toward their ultimate goal of self-realization and union with the divine. The eternal and supreme power of Goddess Lakshmi is thus celebrated in this verse, reinforcing her status as the embodiment of cosmic energy and divine grace.

Verse 5: The Protector and Mother of the Universe

Verse 5 describes Mahalakshmi as the protector and mother of the universe, seated on a lotus throne. She embodies divine love and cosmic energy, nurturing all creation. This verse highlights her role in dispelling ignorance and protecting devotees from adversity. By chanting this verse, one seeks her maternal care and wisdom, fostering spiritual growth and worldly harmony. Her nurturing presence ensures the well-being of the universe, making her the ultimate protector and guide for her devotees. This verse is a heartfelt tribute to her boundless compassion and universal motherhood.

Verse 6: The Great Prosperity and Sin Remover

Verse 6 glorifies Mahalakshmi as the embodiment of boundless prosperity and the remover of sins. She is described as both gross and subtle, wielding immense power and prosperity. This verse emphasizes her ability to eliminate all karmic impurities and bestow wealth. Chanting this verse helps destroy sins, grants material abundance, and purifies the soul, ensuring a life filled with divine grace and eternal prosperity. Her blessings are sought to overcome adversity and attain spiritual and material wealth. This verse is a powerful invocation for purification and prosperity.

Verse 7: The Supreme Brahman and Universe Mother

Verse 7 extols Mahalakshmi as the Supreme Brahman and the Mother of the universe, seated on a lotus; She is revered as the ultimate reality, the great Lord, and the remover of all miseries. This verse underscores her divine omnipresence and her role in nurturing creation. Chanting this verse is believed to grant liberation and spiritual enlightenment, connecting devotees to her eternal essence. It embodies her cosmic significance and her benevolent grace in sustaining life and guiding souls toward divine union.

Verse 8: The White-Robed Devi

Verse 8 describes Mahalakshmi as the White-Robed Devi, seated on a lotus, embodying purity and divine light. She is celebrated as the remover of all sins and the eternal, timeless power. This verse emphasizes her cosmic essence, portraying her as the ultimate refuge and the mother of the universe. Chanting this verse is believed to purify the soul and bestow liberation, connecting devotees to her boundless compassion and divine grace. Her white robes symbolize her immaculate and transcendent nature.

Benefits of Chanting Mahalakshmi Ashtakam

Chanting Mahalakshmi Ashtakam brings spiritual and material prosperity, removes sins, and grants desires. It offers divine protection, fulfilling wishes and ensuring well-being, while fostering inner peace and harmony.

Spiritual and Material Prosperity

Chanting Mahalakshmi Ashtakam fosters spiritual growth and material abundance; It helps devotees attain peace, prosperity, and success in both worldly and divine realms. The hymn is believed to grant desires, ensuring wealth and happiness while fostering inner harmony and balance; Regular recitation strengthens one’s connection to Goddess Lakshmi, the embodiment of divine wealth and wisdom, leading to a fulfilling and prosperous life.

Removal of Sins and Suffering

The Mahalakshmi Ashtakam is revered for its power to absolve sins and alleviate suffering. By chanting this hymn with devotion, devotees seek forgiveness for past misdeeds and find solace from life’s challenges; It is believed that the divine grace of Goddess Lakshmi, invoked through these verses, purifies the soul and brings relief from emotional and mental distress, offering a path to spiritual cleansing and renewed peace of mind.

Granting of Desires and Wealth

The Mahalakshmi Ashtakam is a powerful hymn dedicated to Goddess Lakshmi, revered for its ability to grant desires and bestow wealth. By chanting these sacred verses with devotion, believers seek not only material prosperity but also the fulfillment of their heartfelt wishes. Originating from the Padma Purana and chanted by Lord Indra, this hymn is a cherished prayer among devotees, especially during auspicious occasions, as it is believed to invoke Goddess Lakshmi’s blessings for a prosperous and joyful life.

How to Download the PDF

The Mahalakshmi Ashtakam PDF is available on platforms like Google and spiritual websites. Search using keywords like “Mahalakshmi Ashtakam PDF” to find and download it for free or read online.

Available Platforms for Download

The Mahalakshmi Ashtakam PDF can be downloaded from various platforms including Google Books, Sanskrit libraries, and devotional websites. Many spiritual sites offer it for free download in multiple formats, such as PDF or text files. Additionally, platforms like Archive.org and Sanskrit.safire.com host the document for easy access. Devotees can also find it through Google Drive links shared by communities or temples, ensuring widespread availability for those seeking the hymn in digital form.

Steps to Access the PDF

To access the Mahalakshmi Ashtakam PDF, visit platforms like Google Books or Archive.org. Use keywords like “Mahalakshmi Ashtakam PDF” in the search bar. Filter results by file type to find PDFs. Click on the download link provided by reputable sources. Follow on-screen instructions to complete the download. Ensure the file is from trusted websites to avoid any security risks. This process is straightforward and quick, making the hymn easily accessible for devotees worldwide.

The Mahalakshmi Ashtakam is a divine hymn offering immense spiritual and material benefits. Chanting it regularly brings prosperity, peace, and divine grace. Embrace its power daily for a blessed life.

Final Thoughts on the Ashtakam’s Importance

The Mahalakshmi Ashtakam holds profound significance as a sacred hymn, offering spiritual and material prosperity. Its verses, rich in devotion, connect believers to Goddess Lakshmi, embodying her divine grace and power. Regular recitation fosters inner peace, wealth, and success, making it a timeless prayer for seekers of both spiritual growth and worldly blessings. Embrace its chanting to experience the transformative power of this ancient hymn in your life.

Encouragement for Daily Recitation

Embrace the habit of reciting the Mahalakshmi Ashtakam daily to invite divine blessings into your life. This sacred hymn, with its profound verses, fosters spiritual growth, prosperity, and inner peace. By chanting it regularly, you align yourself with Goddess Lakshmi’s grace, paving the way for wealth, success, and harmony. Make it a part of your daily routine to experience its transformative power and bask in the divine energy it embodies.

12-lead ecg placement pdf

The 12-lead ECG is a fundamental diagnostic tool for assessing cardiac electrical activity. Accurate electrode placement ensures precise recordings, enabling effective diagnosis of heart conditions and monitoring.

1.1 Overview of 12-Lead ECG

A 12-lead ECG is a comprehensive tool for assessing the heart’s electrical activity, providing a detailed view of cardiac function from multiple angles. It uses 10 electrodes placed on the body to generate 12 leads, offering insights into various cardiac conditions. This diagnostic method is widely used in both clinical and non-clinical settings to detect abnormalities such as ischemia, arrhythmias, and structural heart diseases. The 12-lead system is standardized, ensuring consistency in recordings and interpretations across different devices and settings. Its versatility allows it to be used in emergency situations, routine check-ups, and long-term monitoring, making it a cornerstone of cardiovascular care and diagnosis.

1.2 Importance of Accurate Electrode Placement

Accurate electrode placement is crucial for obtaining reliable 12-lead ECG readings. Misplacement can lead to inaccurate or misleading results, potentially causing incorrect diagnoses or delayed treatment. Proper positioning ensures that each lead captures the correct electrical signals from the heart, providing a clear and precise representation of cardiac activity. Consistent placement also allows for comparability between serial ECGs, aiding in the detection of subtle changes over time. Furthermore, accurate placement minimizes artifacts and interference, enhancing the quality of the recording. Adhering to standardized guidelines ensures that healthcare professionals can confidently interpret ECGs, making it a critical step in patient care and management.

Fundamentals of 12-Lead ECG Electrode Placement

The fundamentals of 12-lead ECG electrode placement involve standard locations for limb and chest leads. Consistent placement is key for accurate readings, avoiding bone and ensuring proper alignment, especially in female patients.

2.1 Standard Placement Locations for Limb Leads

The standard placement for limb leads involves positioning electrodes on the arms and legs. The RA (right arm) and LA (left arm) electrodes are placed on the distal ends of the wrists, while the RL (right leg) and LL (left leg) electrodes are positioned on the medial aspects of the ankles. It is crucial to avoid placing electrodes directly over bones or joints to minimize interference. For consistency, electrodes should be placed 1-2 cm away from the wrists and ankles. Proper placement ensures accurate recordings and avoids artifacts. Consistency across placements is vital for reliable ECG interpretations. Always refer to standardized guidelines for precise locations.

2.2 Proper Placement of Chest Leads

Proper placement of chest leads (V1-V6) is critical for capturing accurate anterior and lateral heart activity. V1 and V2 are placed at the fourth intercostal space, right and left of the sternum, respectively. V3 is midway between V2 and V4. V4 is at the fifth intercostal space, mid-clavicular line. V5 and V6 are placed horizontally aligned with V4, in the anterior axillary line. For female patients, chest leads should be placed under the breast tissue to avoid interference. Consistent placement ensures comparability of ECGs over time. Always use anatomical landmarks to guide placement and ensure electrodes are firmly attached to the skin for clear signals. Correct positioning minimizes artifacts and enhances diagnostic accuracy.

2.3 Key Anatomical Landmarks for Electrode Placement

Accurate electrode placement relies on identifying key anatomical landmarks. The manubrium of the sternum is the reference point for limb leads (RA, LA, RL, LL). Chest leads (V1-V6) are placed based on intercostal spaces and rib alignment. V1 and V2 are at the 4th intercostal space, right and left of the sternum. V4 is at the 5th intercostal space, mid-clavicular line. V3 is midway between V2 and V4, while V5 and V6 are placed anterior to the mid-axillary line. Proper alignment ensures electrodes avoid bony structures and breast tissue, optimizing signal clarity. Palpation of landmarks is essential for precise placement, ensuring reliable ECG recordings.

Step-by-Step Guide to 12-Lead ECG Placement

This guide provides a structured approach to placing electrodes for a 12-lead ECG, ensuring accuracy and patient comfort. Follow the sequence for optimal results.

3.1 Preparing the Patient and Equipment

Begin by explaining the procedure to the patient and ensuring they are comfortable. Position the patient in a supine position with arms at their sides. Remove jewelry and clothing that may interfere with electrode placement. Clean and dry the skin to ensure good electrode adhesion, using alcohol pads if necessary. Gather all necessary equipment, including electrodes, leads, and the ECG machine. Turn on the device and perform a quick calibration check. Ensure the environment is quiet and free from interference to minimize artifact. Proper preparation ensures accurate readings and a smooth process for both the patient and technician.

3.2 Placing Limb Electrodes (RA, LA, RL, LL)

Place the RA electrode on the right arm, 1-2 cm above the wrist, on the lateral (outer) aspect. The LA electrode goes on the left arm, mirroring the RA; For the lower limbs, position the RL electrode on the right leg, 1-2 cm above the ankle on the lateral aspect, and the LL electrode on the left leg, similarly placed. Ensure electrodes are not placed over joints or bony prominences. Secure them firmly to prevent movement and ensure good adhesion. This placement minimizes interference from muscle activity and ensures accurate recordings of the heart’s electrical activity;

3.3 Placing Chest Electrodes (V1-V6)

Begin by locating the fourth intercostal space at the midclavicular line for V1 and V2. Place V1 to the right of the sternum and V2 to the left. V3 is positioned midway between V2 and V4. V4 goes at the midclavicular line in the fifth intercostal space. V5 is placed in the anterior axillary line at the same level as V4, and V6 is further along the midaxillary line. Ensure electrodes are aligned horizontally and secured firmly, avoiding hair or muscle tissue for clear signals. Proper placement ensures accurate capture of the heart’s electrical activity from the chest leads.

Tips for Optimal ECG Readings

Ensure proper skin preparation, minimize interference, and secure electrodes firmly to avoid artifacts. Maintain a calm, still patient and use high-quality equipment for clear, accurate recordings.

4.1 Ensuring Proper Skin Preparation

Proper skin preparation is essential for obtaining high-quality ECG readings. Clean the skin thoroughly with alcohol to remove oils, lotions, or dirt, ensuring good electrode adhesion. Shave hairy areas if necessary to prevent interference. Avoid using excessive force, which may irritate the skin. Dry the area completely before placing electrodes, as moisture can cause artifacts. Ensure the skin is free from oils or residues, as this can impede electrode conductivity. Proper preparation minimizes noise and ensures accurate electrical signals are captured, leading to reliable ECG results. This step is critical for both initial and follow-up recordings to maintain consistency and comparability.

4.2 Minimizing Artifact Interference

Artifact interference can significantly distort ECG readings, leading to inaccurate interpretations. Common sources include muscle movement, electrical interference, and poor electrode adhesion. To minimize artifacts, ensure electrodes are securely placed on clean, dry skin and avoid areas with excessive hair or scar tissue. Use high-quality electrodes and maintain a quiet, stable environment during the recording. Patient movement should be discouraged, and electrical devices nearby should be turned off. Consistent electrode placement and proper skin preparation are also critical. Regularly inspect electrodes for loose connections, and ensure the ECG machine is calibrated correctly. By addressing these factors, you can reduce interference and obtain clearer, more reliable ECG tracings.

Troubleshooting Common Placement Errors

Identify misplaced electrodes by checking lead positioning and skin preparation. Correcting errors involves repositioning electrodes and ensuring proper adhesion to avoid signal distortions and inaccurate readings.

5.1 Identifying and Correcting Misplaced Electrodes

Accurate electrode placement is critical for clear ECG readings. Misplaced electrodes can lead to artifacts or inaccurate tracings. Common errors include incorrect limb lead placement, improper chest lead positioning, or failure to align electrodes with anatomical landmarks. To identify issues, inspect electrode positions and compare the ECG tracing to baseline norms. Correct misplaced electrodes by repositioning them according to standard guidelines, ensuring proper adhesion and skin contact. Pay special attention to chest leads, as small deviations can significantly affect readings. Verifying electrode placement before recording ensures reliable results and accurate cardiac assessments. Always refer to standardized protocols to maintain consistency and diagnostic accuracy;

5.2 Avoiding Errors in Chest Lead Placement

Accurate chest lead placement is vital for obtaining clear ECG readings. Errors often occur due to incorrect positioning or failure to align leads with anatomical landmarks. To avoid mistakes, ensure V1 and V2 are placed at the 4th intercostal space, near the sternum. V3 should be midway between V2 and V4, while V4 is at the 5th intercostal space, midclavicular line. V5 and V6 are placed horizontally aligned with V4, at the anterior axillary line. Use a stethoscope to locate the apical beat for precise V5 and V6 placement. Avoid placing leads over muscle or bone, as this can cause interference. Properly secure electrodes to prevent movement artifacts and ensure consistent, high-quality recordings. Regularly verify lead positions to maintain diagnostic accuracy and reliability.

Special Considerations

Accurate 12-lead ECG placement varies for female, pediatric, and geriatric patients. Adjustments ensure proper electrode positioning, avoiding interference from breast tissue in women and accommodating smaller body sizes in children and elders.

6.1 Electrode Placement in Female Patients

Proper 12-lead ECG electrode placement in female patients requires careful consideration to avoid interference from breast tissue. Chest leads (V1-V6) should be placed under the breast tissue when necessary, ensuring direct contact with the skin. Avoid placing electrodes on dense breast tissue to minimize artifacts. For limb leads, standard placements apply, but ensure electrodes are secure and comfortable. Skin preparation is crucial to enhance conductivity and reduce motion artifacts. Additionally, electrode adhesion should be checked to prevent displacement during movement. Accurate placement ensures reliable ECG readings, aiding in precise cardiac assessments for female patients.

6.2 Placement in Pediatric and Geriatric Patients

In pediatric patients, accurate 12-lead ECG placement requires adjusting for smaller body sizes. Limb electrodes should be proportionally placed, and chest leads (V1-V6) positioned according to the child’s anatomy. Geriatric patients may need electrodes placed carefully due to skin fragility or folds. Ensure electrodes adhere securely without causing discomfort. For both groups, skin preparation is vital to enhance conductivity. In pediatric cases, minimize movement to avoid artifacts. Geriatric patients may require additional time for electrode placement due to potential subcutaneous fat or bony prominences. Tailoring techniques to these populations ensures high-quality ECG recordings and accurate cardiac assessments.

Accurate 12-lead ECG placement is vital for reliable cardiac assessments. Proper electrode positioning and adherence to best practices ensure optimal recordings, aiding in precise diagnoses and effective patient care.

7.1 Summary of Best Practices

Accurate 12-lead ECG placement requires meticulous attention to detail. Ensure proper skin preparation by cleaning and drying the skin to enhance electrode adhesion and signal quality. Always use standardized electrode positions, avoiding bone and placing chest leads consistently. Minimize artifacts by ensuring the patient remains still, avoids talking, and keeps muscles relaxed during the recording. Verify electrode placement and connection before starting the ECG to prevent errors. Use high-quality electrodes and ensure proper equipment calibration. Consistency in lead placement across recordings is crucial for accurate comparisons. Always follow manufacturer guidelines for equipment use and maintenance. Proper documentation and verification of electrode placement are essential for reliable results.

7.2 Resources for Further Learning

For deeper understanding, explore comprehensive guides like the American Heart Association’s ECG Handbook or online courses from platforms like Coursera and Udemy. Websites such as ECGLibrary and Medical Training Institute offer detailed tutorials and diagrams. The British Journal of Cardiology publishes evidence-based articles on ECG interpretation. Additionally, video tutorials on YouTube channels like MedCram provide visual aids for electrode placement. Interactive tools, such as ECG simulators, allow hands-on practice. Always refer to peer-reviewed journals and reputable medical websites for updated practices. These resources help healthcare professionals refine their skills and stay current with advancements in 12-lead ECG placement and interpretation.

asco transfer switch manual

Welcome to the ASCO Transfer Switch Manual, your comprehensive guide to installing, operating, and maintaining ASCO transfer switches for reliable power management solutions.

Overview of ASCO Transfer Switches

ASCO transfer switches are designed to automatically or manually switch power sources, ensuring reliable backup power during outages. Available in various sizes, they support critical applications, from light industrial to large commercial systems. These switches are UL 1008 compliant, offering advanced features like load banking and remote monitoring. Built for durability, ASCO switches provide seamless power transitions, making them essential for mission-critical power management solutions.

Importance of the Manual for Installation and Operation

Importance of the Manual for Installation and Operation

This manual is essential for ensuring the proper installation, operation, and maintenance of ASCO transfer switches. It provides detailed instructions, safety precautions, and troubleshooting guidance to prevent hazards and ensure reliable performance. By following the manual, users can optimize switch functionality, comply with safety standards, and maintain system integrity. It serves as a critical reference for installers, operators, and maintenance personnel to achieve long-term efficiency and safety.

Key Features of ASCO Transfer Switches

ASCO transfer switches offer automatic and manual operation, load disconnect contacts, and remote control options. They are UL 1008 compliant, ensuring high reliability and safety for critical power systems.

Automatic and Manual Transfer Capabilities

ASCO transfer switches offer seamless automatic operation during power failures and manual control for maintenance or emergencies; Automatic mode ensures quick, reliable transitions between power sources, while manual mode allows operators to switch sources intentionally. The switch features clear position indicators (SOURCE 1, SOURCE 2, DISCONNECTED) for easy status verification, ensuring smooth transitions and minimizing downtime in critical power applications.

Load Disconnect and Engine Control Contacts

ASCO transfer switches feature load disconnect contacts for safely isolating the load during maintenance and engine control contacts for managing generator operation. These contacts enable smooth transitions, ensuring the generator starts or stops as needed. Load disconnect contacts prevent unexpected power flow, while engine control contacts handle signals for generator startup and shutdown, enhancing reliability and safety in power transfer applications.

Remote Control and Monitoring Options

ASCO transfer switches offer advanced remote control and monitoring capabilities, enabling real-time system oversight and efficient management of power transitions. Users can integrate these switches with critical power management systems for enhanced operational insight. Remote monitoring ensures timely alerts and diagnostics, while control features allow for seamless command execution. These options enhance reliability, simplify troubleshooting, and provide a centralized approach to managing backup power solutions effectively.

Installation and Setup

Proper installation of ASCO transfer switches ensures reliable operation. Mount the switch on a level surface, connect power conductors, and ensure all auxiliary circuits are securely linked. Always follow safety guidelines and manufacturer instructions for a seamless setup process.

Mounting the Transfer Switch

Mounting the ASCO transfer switch requires a level and stable surface. Ensure the enclosure is securely fastened to prevent vibration. Proper alignment with existing electrical systems is crucial for safe operation. Refer to the provided enclosure outline drawings for precise measurements. Always follow the manufacturer’s guidelines to ensure compliance with safety standards and optimal performance.

Connecting Power Conductors and Auxiliary Control Circuits

Connect power conductors to the ASCO transfer switch ensuring correct sizing and secure termination. Auxiliary control circuits, if required, must be properly wired according to the manual. Verify all connections comply with UL 1008 standards and manufacturer guidelines. Ensure the system is de-energized during wiring to prevent electrical hazards. Use torque specifications for terminal connections to guarantee reliable operation and safety.

Pre-Installation Checks and Safety Precautions

Before installing the ASCO transfer switch, ensure the site is prepared and all safety protocols are followed. Verify the rating label matches the application requirements and inspect for damage. De-energize all power sources and use proper personal protective equipment (PPE). Ensure the supporting foundation is level and secure. Follow all local electrical codes and manufacturer guidelines to avoid hazards and ensure compliance with safety standards.

Operation and Control

The ASCO transfer switch ensures seamless power management through automatic and manual modes, providing reliable control and quick transitions between power sources for uninterrupted operation.

Manual Operation Procedure

For manual operation, locate the external handle on the front left of the enclosure. Check the switch position indicators: SOURCE 1, SOURCE 2, or DISCONNECTED. To transfer loads, move the handle to the desired source. Ensure both power sources are disconnected before manual operation. Refer to the manual for detailed steps and safety precautions. Always verify the switch position before resuming operation to avoid power interruptions or system damage.

Automatic Transfer Switch (ATS) Modes

ASCO transfer switches operate in automatic or manual modes. In automatic mode, the ATS seamlessly switches between power sources based on detected faults. Manual mode allows operator intervention for maintenance or specific scenarios. Indicators like blinking lights signal transfer inhibit or active alarms. The controller monitors power conditions and executes transfers to ensure uninterrupted power supply, with features like load disconnect and engine control for enhanced reliability and safety during operation.

Remote and Local Control Features

ASCO transfer switches offer advanced remote and local control capabilities, ensuring seamless power management. Remote monitoring allows users to track system status and receive alerts, while local controls provide direct operation. Features like manual handles and status indicators enhance operational flexibility. These systems integrate with critical power management solutions, offering reliable and efficient control options for both emergency and routine operations, ensuring consistent power delivery and system reliability.

Troubleshooting Common Issues

Identify and isolate faults by checking installation, wiring, and system status. Refer to the ASCO manual for detailed solutions to common transfer switch operational issues.

Identifying and Isolating Faults

Begin by reviewing installation, wiring, and system status. Check for loose connections, incorrect configurations, or damaged components. Verify voltage levels and ensure proper grounding. Consult the ASCO manual for specific troubleshooting steps. Isolate faults by testing individual circuits or components. Use diagnostic tools to identify issues quickly. Always follow safety guidelines to prevent further damage or hazards during the troubleshooting process. Licensed electricians should handle advanced fault isolation and repairs. Ensure all safety protocols are observed to maintain system integrity and operator safety.

Common Causes of Transfer Failures

Transfer failures often result from improper installation, wiring errors, or damaged components. Faulty control circuits, incorrect voltage settings, or worn contacts can disrupt operation. Overloaded systems, poor maintenance, or environmental factors like humidity may also cause issues. Regular inspection and adherence to the ASCO manual’s guidelines can help prevent these failures. Always ensure proper grounding and compliance with UL standards to minimize risks and maintain reliable performance.

Resetting Alarms and Restoring Operation

To reset alarms and restore operation, press the RESET button on the controller after addressing the underlying issue. Ensure all power sources are stable before resetting. Refer to the manual for specific reset procedures, as steps may vary for Series 300 or 7000 models. Always verify the system’s readiness to avoid recurring issues.Consult the troubleshooting guide if alarms persist after reset attempts.

Maintenance and Upkeep

Regular maintenance ensures optimal performance and longevity of ASCO transfer switches. Inspect for wear, clean contacts, and replace parts as needed. Refer to the manual for specific schedules.

Scheduled Maintenance Tasks

Regular maintenance is crucial for ensuring the reliability and longevity of ASCO transfer switches. Schedule annual inspections of electrical connections, contacts, and operating mechanisms. Clean or replace contacts as needed to prevent wear and arcing. Lubricate moving parts per the manual’s recommendations; Additionally, test the transfer switch under load conditions annually to verify proper operation. Always refer to the ASCO manual for specific maintenance schedules and procedures.

Replacement of Wearable Parts

Replace wearable parts like contacts and Arcquip kits periodically to ensure optimal performance. Inspect and clean or replace contacts every 1-2 years or as needed. Lubricate hinge pins and moving parts annually. Always use genuine ASCO replacement parts to maintain reliability. Follow the manual’s procedures for proper part replacement and testing. Schedule replacements during planned maintenance to minimize downtime and ensure continuous power system reliability.

Testing and Verification Procedures

Perform thorough testing and verification after installation and maintenance. Conduct functional tests to ensure proper transfer operation, including insulation resistance and continuity checks. Verify timing settings for transfer and retransfer. Use a multimeter to confirm voltage and current ratings. Test all control circuits and remote monitoring features. Annual testing by a licensed electrician is recommended. Always refer to the manual for specific testing procedures to ensure safe and reliable operation of the transfer switch.

Safety Considerations

Always handle high-voltage components with caution. Wear appropriate PPE, including insulated gloves and safety glasses. Follow proper lockout/tagout procedures and adhere to emergency shutdown protocols to ensure safe operations.

High Voltage Warnings and Precautions

High voltage components in ASCO transfer switches can cause severe injury or death. Avoid touching live parts or components under voltage. Always de-energize the system before maintenance. Use insulated tools and wear appropriate PPE, including gloves and safety glasses. Ensure proper isolation and grounding procedures are followed. Never bypass safety interlocks or attempt unauthorized modifications. Use voltage testers to confirm de-energization before starting work. Adhere strictly to lockout/tagout procedures for safe servicing.

Proper Use of Personal Protective Equipment (PPE)

Always wear appropriate PPE when working with ASCO transfer switches to ensure safety. Use insulated gloves rated for the system voltage, safety glasses with a face shield, and arc-rated clothing for protection against electrical arcs. Ensure PPE meets industry standards like NFPA 70E. Avoid loose jewelry and use non-conductive tools. PPE should be inspected before use and replaced if damaged. Adhere to all safety guidelines to minimize risks during installation, maintenance, or operation.

Emergency Shutdown Procedures

In case of an emergency, immediately disconnect all power sources using the transfer switch’s disconnect feature. Ensure the system is de-energized before performing any maintenance. Activate the emergency stop button if available. Verify voltage absence with a calibrated meter. Switch the transfer switch to the manual position to prevent automatic reconnection. Isolate the system completely and follow all safety protocols to ensure a secure shutdown environment. Always refer to the manual for specific emergency procedures.

Technical Specifications

ASCO transfer switches feature load withstand ratings and fault circuit ratings as specified on the rating label. They comply with UL 1008 standards, ensuring reliability and safety across 30 to 400 amp sizes.

Rating Label and Load Withstand Ratings

The ASCO transfer switch rating label provides detailed specifications, including voltage, current, and fault withstand ratings. These ratings ensure the switch can handle maximum loads safely under various conditions. Compliance with UL 1008 standards guarantees reliability and performance. Always refer to the label for specific values to ensure proper installation and operation of your ASCO transfer switch for optimal power management.

Compliance with UL 1008 Standards

ASCO transfer switches are fully compliant with UL 1008 standards, ensuring reliable performance and safety in emergency power systems. These standards require rigorous testing for fault current withstand, operation, and endurance. Compliance guarantees the switch can safely transfer power between sources, meeting critical demands during outages. This certification reinforces ASCO’s commitment to quality and reliability in power management solutions for commercial and industrial applications.

Advanced Features

  • Load Banking: Allows testing of generators under full load conditions for optimal performance.
  • Quick Connects: Enables seamless integration of portable generators for temporary power solutions.
  • Critical Power Management: Enhances system reliability by integrating with advanced power management systems.

Load Banking and Quick Connects for Portable Generators

ASCO transfer switches offer advanced features like load banking, enabling generators to test under full load conditions for optimal performance. Quick connects simplify portable generator integration, providing temporary power solutions. These features ensure seamless backup power transitions, enhancing system reliability and flexibility. They are designed for commercial and light industrial use, supporting critical power needs effectively.

Integration with Critical Power Management Systems

ASCO transfer switches seamlessly integrate with critical power management systems, ensuring centralized control and monitoring of power distribution. This integration enhances system efficiency, enabling real-time data analysis and automated responses. It supports mission-critical applications, providing reliable backup solutions. The advanced features ensure optimal performance and compatibility with existing infrastructure, making them ideal for industries requiring uninterrupted power supply and robust power management capabilities.

This manual provides essential guidance for installing, operating, and maintaining ASCO transfer switches, ensuring reliable power management and compliance with safety standards for emergency systems.

Best Practices for Long-Term Reliability

Regular maintenance, including inspecting contacts and exercising the switch, ensures optimal performance. Always follow ASCO’s guidelines for scheduled maintenance tasks. Proper installation by a licensed electrician and adherence to safety protocols are critical. Test the switch periodically to verify functionality. Use personal protective equipment when working with high voltage. Keep emergency shutdown procedures readily accessible. These practices ensure your ASCO transfer switch provides dependable power management for years.

Final Checks and Operational Readiness

Before placing the ASCO transfer switch into service, ensure all connections are secure and settings are correctly configured. Test the switch under load to confirm proper operation. Verify that all indicators, alarms, and remote monitoring systems function as intended. Conduct a final inspection to ensure compliance with safety standards and operational readiness. Document the results and ensure all personnel are trained on emergency procedures and system operation.

15 minute resistance band workout pdf

Resistance band workouts offer a convenient, portable, and effective way to build strength and improve fitness in just 15 minutes․ Perfect for busy schedules and travel․

1․1 Overview of Resistance Bands

Resistance bands are lightweight, versatile tools offering varied resistance levels to target multiple muscle groups․ They are portable, easy to use, and suitable for all fitness levels․ Ideal for full-body workouts, bands provide consistent tension, enhancing strength and flexibility․ Their simplicity makes them perfect for quick, effective sessions, such as 15-minute routines, at home or while traveling․

1․2 Advantages of Short Duration Workouts

Short duration workouts, like 15-minute resistance band sessions, offer convenience, efficiency, and measurable results․ They boost metabolism, engage multiple muscle groups, and fit seamlessly into busy schedules․ These workouts are ideal for maintaining consistency, improving cardiovascular health, and enhancing strength without requiring significant time commitments, making them accessible for all fitness levels and lifestyles․

Benefits of 15-Minute Resistance Band Workouts

15-minute resistance band workouts offer time efficiency, portability, and cost-effectiveness, providing a full-body workout that suits all fitness levels and enhances strength and cardiovascular health․

2․1 Time Efficiency

A 15-minute resistance band workout is designed to maximize efficiency, fitting into tight schedules while delivering impactful results․ It targets multiple muscle groups simultaneously, boosting heart rate and improving cardiovascular health․ This concise format ensures quick, effective sessions, perfect for busy individuals seeking to maintain or enhance fitness without lengthy commitments, offering a balanced blend of strength and cardio benefits in minimal time․

2․2 Portability and Convenience

Resistance bands are lightweight and easy to carry, making them ideal for workouts on the go․ They require minimal space, allowing you to exercise anywhere, from a hotel room to an outdoor park․ This portability ensures you can maintain your fitness routine while traveling or when space is limited, offering unmatched convenience for busy lifestyles․

2․3 Cost-Effectiveness

Resistance bands are an affordable fitness option, offering a budget-friendly alternative to expensive gym equipment or memberships․ They are durable, long-lasting, and versatile, providing a variety of exercises for full-body workouts․ Their low cost and ability to be used anywhere make them a cost-effective solution for maintaining fitness without financial strain or commitment to gym fees․

Equipment Needed for the Workout

A high-quality resistance band, gloves for grip, and optional anchors or handles are essential․ These tools ensure safety, comfort, and versatility for effective 15-minute workouts anywhere․

3․1 Types of Resistance Bands

Resistance bands come in various styles, including loop, tube, and therapy bands․ Loop bands are versatile for full-body exercises, while tube bands offer handles for better grip․ Therapy bands are lightweight, ideal for rehab․ Figure-8 bands provide dual resistance for upper body workouts․ Choose based on durability, resistance levels, and portability to suit your fitness goals and workout space․

3․2 Essential Accessories

Elevate your workout with a high-quality exercise mat for comfort and hygiene․ A resistance band chart or guide ensures proper form and routine tracking․ A timer helps maintain the 15-minute structure, while safety handles or gloves prevent injuries․ These accessories enhance safety, convenience, and effectiveness, making your workout experience more enjoyable and productive․

Structure of the 15-Minute Workout

A 15-minute workout includes a dynamic warm-up, circuit training with resistance bands, and a cool-down stretch, ensuring efficiency and full-body engagement in minimal time․

4․1 Warm-Up Routine

A 5-minute warm-up routine is essential to prepare the body for exercise․ Dynamic stretches like arm circles, leg swings, and torso twists increase blood flow and flexibility․ Light resistance band movements, such as banded shoulder rotations and chest presses, activate the muscles without strain․ This routine ensures readiness for the workout ahead, reducing injury risk and improving performance․

4․2 Circuit Training Setup

Set up a circuit with 4-6 exercises, focusing on full-body engagement․ Perform each exercise for 30-50 seconds, followed by 10 seconds of rest․ Repeat the circuit 3-4 times, totaling 10-12 minutes of work․ This format maximizes efficiency, targeting multiple muscle groups while enhancing cardiovascular fitness․ It’s ideal for a 15-minute workout, ensuring a balanced and intense session․ Proper form and pacing are key to effectiveness․

4․3 Cool Down Stretching

Finish with static stretches for 3-5 minutes, focusing on major muscle groups․ Stretch hamstrings, quads, chest, and shoulders, holding each for 20-30 seconds․ Incorporate deep breathing to relax muscles and improve flexibility․ This cooldown helps prevent soreness and promotes recovery, ensuring your body is prepared for the next workout․ Move slowly and avoid bouncing to maintain safety and effectiveness․

Full-Body Exercises

Engage multiple muscle groups with dynamic movements like band squats, chest presses, and rows․ These exercises target the upper body, lower body, and core simultaneously for efficient workouts․

5․1 Upper Body Exercises

Effective upper body exercises include bicep curls, tricep dips, chest presses, and lateral raises․ These movements target the arms, shoulders, and chest, promoting muscle growth and strength․ Resistance bands provide consistent tension, ensuring a challenging workout․ Incorporate these exercises into your 15-minute routine to enhance upper body fitness efficiently and conveniently, perfect for both home and travel use․

5․2 Lower Body Exercises

Lower body exercises with resistance bands focus on strengthening the legs, glutes, and hips․ Squats, lunges, and leg presses are effective movements that target these muscle groups․ The bands provide resistance throughout the entire range of motion, enhancing muscle engagement․ These exercises are versatile, allowing for modifications to suit different fitness levels while delivering a comprehensive lower body workout in just minutes․

5․3 Core Strengthening Exercises

Core strengthening exercises with resistance bands target the abs, obliques, and lower back․ Planks, Russian twists, and overhead presses are effective movements that engage the core muscles․ These exercises improve stability, balance, and posture while being easy to incorporate into a short workout routine․ They offer a time-efficient way to build a stronger, more defined core in just minutes daily․

Tips for Maintaining Proper Form

Keep your core engaged, maintain proper alignment, and use smooth, controlled movements․ Avoid slouching or jerking the bands, ensuring even tension throughout exercises for maximum safety and effectiveness․

6․1 Common Mistakes to Avoid

Common mistakes include using the wrong resistance level, improper anchoring, and poor body positioning․ Avoid overstretching bands, as this can cause snapping․ Ensure proper form by keeping the core engaged and maintaining a full range of motion․ Jerky movements and neglecting to warm up can lead to injury․ Focus on controlled, smooth actions for safe and effective workouts․

6․2 Breathing Techniques

Proper breathing is essential for maximizing workout effectiveness and preventing injury․ Inhale during the relaxation phase and exhale during the resistance phase to maintain rhythm․ Avoid holding your breath, as this can lead to dizziness or muscle tension․ Consistent, controlled breathing enhances stamina and ensures safe, effective exercises throughout your 15-minute resistance band workout routine․

Modifications for Different Fitness Levels

Resistance band workouts can be modified to suit different fitness levels․ Beginners can use lighter bands, while advanced users can increase reps or intensity․ Proper technique ensures safety and effectiveness for all․

7․1 Beginner Adjustments

Beginners can modify resistance band workouts by using lighter bands or reducing reps․ Start with bodyweight exercises and gradually add resistance․ Focus on proper technique to avoid injury․ Short breaks between sets and lower intensity can help build a strong foundation․ This approach ensures safety and progress, making the workout accessible for those new to resistance training․

7․2 Advanced Variations

For advanced users, increase intensity by using heavier bands, extending range of motion, or adding complex movements․ Incorporate dynamic exercises like band rotations or explosive reps․ Reduce rest periods between sets and combine compound movements for a full-body challenge․ These variations enhance strength, endurance, and muscle engagement, catering to those seeking a more rigorous workout․

Tracking Progress and Staying Motivated

Track progress by logging workouts and measuring improvements․ Stay motivated by setting achievable goals and celebrating small victories, ensuring consistency and long-term commitment to fitness․

8․1 Setting Realistic Goals

Set specific, achievable goals for your 15-minute resistance band workouts, such as increasing reps or resistance over time․ Start with manageable targets, track progress, and celebrate milestones to stay motivated and committed to your fitness journey․

8․2 Using a Workout Journal

Maintain consistency and motivation by documenting your 15-minute resistance band workouts in a journal․ Record exercises, resistance levels, and reps to track progress․ Reflect on your routine regularly to identify improvements and stay accountable; Celebrate milestones and adjust goals as you evolve, ensuring continuous growth and engagement in your fitness journey․

Safety Precautions

Inspect resistance bands for wear and tear before use․ Avoid using damaged bands to prevent snaps․ Ensure the workout area is clear of obstacles to minimize injury risks․

9․1 Proper Handling of Bands

Inspect resistance bands for frays or cracks before use․ Anchor bands securely to prevent slipping․ Store bands away from direct sunlight and extreme temperatures to maintain elasticity and durability․

9․2 Injury Prevention Tips

Always warm up before starting․ Wear proper attire and ensure bands are secure․ Start with lighter resistance to avoid strain․ Avoid snapping bands near the face․ Check for damaged bands beforehand․ Focus on controlled movements and proper form․ Stop if pain occurs and rest as needed․ Listen to your body to prevent overexertion․

Resistance band workouts are a convenient and effective way to transform your body in just 15 minutes․ For more detailed routines, check out the 15 Minute Resistance Band Workout PDF guide․

10․1 Summarizing the Workout

A 15-minute resistance band workout is a time-efficient, full-body routine that combines strength training and cardio․ It engages multiple muscle groups, improves flexibility, and boosts metabolism․ The workout is ideal for home or travel, requiring minimal equipment․ Focus on proper form, adjustable resistance levels, and consistent effort to maximize results․ Perfect for busy individuals seeking a quick, effective fitness routine․

10․2 Recommended Reading and Guides

For further guidance, download the 15 Minute Resistance Band Workout PDF, which offers detailed routines and visual aids․ Explore expert tips on progression, form, and variations․ Additional resources include workout journals, fitness apps, and motivational blogs․ These guides cater to all fitness levels, ensuring a safe and effective workout experience with resistance bands․

centigrade to fahrenheit chart pdf

Temperature conversion charts are essential tools for translating Celsius to Fahrenheit, offering clear, standardized references for everyday use in cooking, weather, and scientific applications.

1.1 Importance of Celsius to Fahrenheit Conversion

Celsius to Fahrenheit conversion is vital for universal communication, particularly in cooking, weather forecasting, and scientific research. It ensures accuracy and consistency across diverse applications, making it indispensable for global collaboration and practical everyday use. Charts simplify this process, providing quick references for precise temperature translations, eliminating the need for complex formulas in real-world scenarios.

1.2 Overview of Temperature Conversion Charts

Temperature conversion charts provide a structured and visually appealing way to translate Celsius to Fahrenheit. They typically include a range of temperatures with corresponding values, often in PDF format for easy sharing and printing. These charts are designed for quick reference, making them ideal for educational, professional, and everyday use. They enhance understanding and simplify the conversion process for users of all levels.

Understanding the Celsius to Fahrenheit Formula

The formula to convert Celsius to Fahrenheit is °F = (°C × 9/5) + 32, providing a precise mathematical relationship to accurately translate temperatures between the two scales.

2.1 The Mathematical Formula for Conversion

The formula to convert Celsius to Fahrenheit is °F = (°C × 9/5) + 32. This equation allows precise conversion by multiplying the Celsius temperature by 9/5 and then adding 32. For example, 10°C equals 50°F using this formula. Understanding this mathematical relationship is fundamental for accurate temperature translations in various applications, ensuring consistency and reliability in results.

2.2 Step-by-Step Process for Manual Conversion

Manually converting Celsius to Fahrenheit involves three straightforward steps. First, multiply the Celsius temperature by 9/5. Next, add 32 to the result. Finally, record the final value as the Fahrenheit temperature. For example, converting 20°C: (20 × 9/5) = 36, then 36 + 32 = 68°F. This method ensures accuracy without relying on electronic tools, making it a reliable fallback in any situation.

Designing a Celsius to Fahrenheit Chart

A well-designed chart ensures clarity and readability, featuring the Celsius scale on one axis and Fahrenheit on the other. Include the conversion formula and a range of common temperatures for quick reference. Organize the data in a clean table format with clear headers and consistent intervals to make it user-friendly and visually appealing.

3.1 Key Elements of an Effective Chart

An effective Celsius to Fahrenheit chart includes clear labeling, consistent intervals, and a clean layout. Use bold headers for scales, ensure readability with a standard font size, and avoid clutter. Add color coding or shading to differentiate ranges. Include the formula C = (F ⏤ 32) × 5/9 for quick conversions. Provide a legend if using symbols or patterns. Ensure compatibility with both digital and print formats for versatility.

3.2 How to Create a Chart in PDF Format

To create a Celsius to Fahrenheit chart in PDF format, use design tools like Excel or Canva. Set up a table with Celsius and Fahrenheit columns, ensuring accurate conversions using the formula C = (F ⏤ 32) × 5/9. Add headers and footers for clarity. Export or print the design as a PDF, ensuring high-resolution for readability. Save and share the file for easy access and printing.

Examples of Celsius to Fahrenheit Charts

Charts typically include common temperature ranges, such as freezing and boiling points of water (0°C/32°F and 100°C/212°F). They also cover everyday applications like cooking and weather forecasts.

4.1 Common Temperature Ranges and Conversions

Charts often feature key temperature ranges, such as the freezing and boiling points of water (0°C/32°F and 100°C/212°F). Everyday applications include cooking (e.g., baking at 350°F/175°C) and weather forecasts. These charts also cover extreme temperatures, like -40°C/-40°F, where both scales align. They provide quick references for converting temperatures in science, engineering, and household tasks, ensuring accuracy and ease of understanding for users worldwide.

4.2 Sample PDF Chart Templates

Sample PDF templates for Celsius to Fahrenheit charts are widely available online, offering pre-designed layouts for easy reference. These templates typically include conversion formulas, temperature ranges, and clear grids for readability. Many feature color-coded sections to differentiate temperature zones, making them visually appealing and user-friendly. They are ideal for printing or digital use, providing a quick and reliable way to convert temperatures accurately.

Tips for Customizing Your Chart

Enhance your chart’s usability by adding color coding, formulas, and annotations. Customize fonts, sizes, and layouts to suit your needs for clarity and professional presentation.

5.1 Adding Color Coding for Better Readability

Color coding enhances readability by visually differentiating temperature ranges. Use vibrant colors for extreme temperatures and subtle shades for moderate ranges. Ensure consistency in color schemes across the chart for uniformity. This method helps users quickly identify temperature zones, improving comprehension and practical application of the data. Include a legend to explain the color scheme for clarity.

5.2 Including Conversion Formulas in the Chart

Incorporating the conversion formulas directly into the chart aids users in understanding the mathematical basis of temperature changes. Display the formulas for Celsius to Fahrenheit and vice versa in a dedicated section. This addition enhances the chart’s educational value, allowing users to perform manual calculations if needed. Ensure the formulas are clearly presented and easily distinguishable from the rest of the data for optimal usability.

Using the Chart for Practical Applications

Temperature conversion charts are invaluable for cooking, baking, and weather forecasting, providing quick references for precise temperature adjustments in everyday tasks and scientific applications.

6.1 How to Apply the Chart in Cooking and Baking

Chefs and bakers rely on accurate temperature conversions to ensure recipes turn out perfectly. A Celsius to Fahrenheit chart is a quick reference for adjusting oven temperatures, melting points, and ingredient behaviors. For example, converting 180°C to 350°F ensures cakes bake correctly. This chart is especially useful when following international recipes or adapting cooking techniques, making it an essential kitchen tool for consistency and success.

6.2 Importance in Weather Forecasting and Science

Temperature conversion charts are vital in weather forecasting for accurately reporting conditions across regions using different scales. Scientists rely on these charts to ensure data consistency in climate studies and experiments. For instance, converting 0°C to 32°F or 100°C to 212°F is crucial for understanding freezing and boiling points globally, making the chart an indispensable tool for precise and comparable scientific analysis and weather reporting.

Popular Tools for Creating and Editing PDF Charts

Adobe Acrobat is a top choice for designing professional PDF charts, while free tools like SmallPDF and Canva offer user-friendly options for creating and editing charts efficiently.

7.1 Adobe Acrobat for Professional Designs

Adobe Acrobat is a premier tool for creating and editing PDF charts professionally. It offers advanced customization, design flexibility, and high-quality output. Users can easily format charts, add interactive elements, and ensure precise alignment. Collaboration features allow teams to review and edit documents seamlessly. Acrobat’s robust capabilities make it ideal for designing polished, professional-grade Celsius to Fahrenheit charts tailored to specific needs or audiences.

7.2 Free Alternatives for PDF Creation

For those seeking cost-effective solutions, free alternatives like Smallpdf, Canva, and LibreOffice Draw offer robust tools for creating Celsius to Fahrenheit charts in PDF format. Smallpdf provides intuitive design options, while Canva excels in user-friendly templates. LibreOffice Draw supports vector graphics, ideal for precision; These tools cater to various needs, ensuring high-quality results without the need for professional software, making them accessible to both casual and advanced users.

Where to Find Pre-Made Celsius to Fahrenheit Charts

Pre-made charts are available on websites like Google Sheets, Template.net, and MathWorks, offering downloadable and printable templates for quick conversion reference.

8.1 Websites Offering Free Downloadable Charts

Websites like Google Sheets, Template.net, and MathWorks provide free, downloadable Celsius to Fahrenheit charts in PDF formats. These templates are customizable and ready-to-print, offering a convenient solution for quick reference. Users can access these resources easily, ensuring accuracy and efficiency in temperature conversions for various applications. These websites are reliable and cater to both personal and professional needs, making them ideal for sharing and printing.

8.2 How to Verify the Accuracy of a Chart

Verifying a Celsius to Fahrenheit chart involves checking its conversions against trusted formulas or reliable sources. Cross-reference key values, such as 0°C = 32°F and 100°C = 212°F, to ensure accuracy. Look for consistent intervals and proper rounding. Additionally, compare the chart with established references like scientific calculators or official weather websites to confirm its reliability and precision in temperature conversions.

Best Practices for Sharing and Using the Chart

Ensure compatibility across devices, use clear fonts, and include conversion formulas for easy reference. Print charts on high-quality paper for visibility and organize data logically for quick access.

9.1 Ensuring Compatibility Across Devices

To ensure your Celsius to Fahrenheit chart is accessible across all devices, save it in a universal PDF format. Test the chart on different screen sizes and browsers to maintain readability. Use clear, legible fonts and avoid overly complex designs. Ensure digital versions are optimized for mobile viewing, with pinch-to-zoom functionality for detailed sections. This ensures seamless usability on smartphones, tablets, and desktops alike, enhancing the overall user experience.

9.2 Printing Tips for Clear Visibility

For clear visibility when printing your Celsius to Fahrenheit chart, use high-resolution settings and standard paper sizes like A4 or Letter. Ensure the chart is scaled appropriately to fit the page without distortion. Choose a clean, uncluttered design with legible fonts and contrasting colors. Print a test page to verify alignment and clarity before producing multiple copies. This ensures your chart remains readable and professional.

Common Mistakes to Avoid in Conversion

Common errors include misapplying the formula, such as adding 32 before multiplying, and incorrect rounding of values, which can lead to significant inaccuracies in results.

10.1 Misapplying the Formula

A common mistake is misapplying the Celsius to Fahrenheit formula. The correct formula is F = (C × 9/5) + 32. Errors often occur when adding 32 before multiplying or misplacing the decimal, leading to inaccurate results. Always ensure the multiplication step is completed first before adding 32 to avoid conversion errors. Double-checking calculations can help prevent these common pitfalls and ensure precise temperature conversions.

10.2 Incorrect Rounding of Values

Incorrect rounding of values is a frequent error in temperature conversion. Rounding too early or to the wrong decimal place can lead to significant inaccuracies. For example, rounding intermediate steps prematurely may result in compounded errors. It’s best to retain more decimal places during calculations and round only the final result. This ensures precision and reliability in the converted temperatures, maintaining accuracy for practical applications like cooking or scientific measurements.

Celsius to Fahrenheit charts provide a practical and accurate way to convert temperatures, ensuring consistency and ease of use across various applications like cooking and science.

11.1 Final Thoughts on Using a Celsius to Fahrenheit Chart

A Celsius to Fahrenheit chart is an invaluable resource for quick and accurate temperature conversions. Its simplicity and clarity make it a must-have tool for professionals and everyday users alike. Whether for cooking, scientific applications, or weather forecasting, these charts ensure a seamless transition between units, providing reliable results. Their availability in PDF format adds convenience, making them accessible anytime, anywhere.

11.2 Encouragement to Explore Further Resources

Exploring additional resources can deepen your understanding of temperature conversion. Websites offering free PDF charts, tutorials, and interactive tools provide hands-on learning. Videos and forums also share practical tips and real-world applications. By leveraging these resources, you can enhance your skills and confidence in using Celsius to Fahrenheit charts effectively in various scenarios, ensuring accuracy and efficiency in your work or studies.

the black cat pdf edgar allan poe

Edgar Allan Poe, a master of Gothic fiction, crafted The Black Cat, a chilling tale exploring psychological darkness, guilt, and the supernatural. Available as a free PDF, the story remains a cornerstone of horror literature, haunting readers with its eerie themes and tragic consequences.

Biographical Background of Edgar Allan Poe

Edgar Allan Poe, born on January 19, 1809, in Boston, Massachusetts, was an American writer, poet, and literary critic. Orphaned at three, he was raised by the Allan family in Virginia. Poe attended the University of Virginia and later enlisted in the U.S. Army, publishing his first book of poetry, Tamerlane and Other Poems, in 1827. His marriage to Virginia Clemm in 1836 and her untimely death in 1847 deeply influenced his work. Poe’s mysterious death on October 7, 1849, remains unsolved. His life’s struggles with loss and hardship shaped his dark, gothic writing style, as seen in The Black Cat.

Overview of “The Black Cat” and Its Significance

The Black Cat, published in 1843, is a chilling tale of psychological descent and supernatural vengeance. The story follows an unnamed narrator whose alcoholism and inner turmoil lead him to commit horrific acts against his beloved cat, Pluto, and later, his wife. Through its exploration of guilt, madness, and the uncanny, Poe masterfully crafts a narrative that lingers in the reader’s mind. The story’s significance lies in its profound psychological depth and its enduring influence on Gothic and horror literature. Its availability as a free PDF has ensured its accessibility, making it a timeless classic for readers worldwide to explore and analyze.

Publication and Historical Context

The Black Cat was first published in The Saturday Evening Post on August 19, 1843, during the rise of Gothic fiction in 19th-century America, reflecting themes of death and madness.

First Publication in The Saturday Evening Post (1843)

Edgar Allan Poe’s The Black Cat first appeared in The Saturday Evening Post on August 19, 1843. This publication introduced readers to the haunting tale of guilt and revenge, marking a significant moment in Gothic literature. The story’s debut in a widely read periodical helped establish Poe’s reputation as a master of dark narratives. Its initial reception was mixed, but it quickly gained recognition for its psychological depth and chilling themes. The publication in The Saturday Evening Post remains a pivotal milestone in the story’s enduring legacy, making it accessible to a broad audience and cementing its place in literary history.

Historical Context of Gothic Fiction in the 19th Century

The 19th century witnessed the rise of Gothic fiction, a genre characterized by themes of horror, the supernatural, and psychological complexity. Edgar Allan Poe’s The Black Cat emerged within this context, reflecting the era’s fascination with death, morality, and the darker aspects of human nature. The story aligns with the Gothic tradition, employing elements like the uncanny and the grotesque to evoke fear and unease. Against the backdrop of industrialization and societal change, Gothic fiction provided an outlet for exploring inner turmoil. Poe’s work, including The Black Cat, stands as a seminal contribution to this literary movement, influencing countless authors and shaping the horror genre.

Plot Summary and Key Events

The story follows a narrator whose alcoholism leads to cruelty towards his beloved black cat, Pluto. After maiming and killing Pluto, a series of horrifying events unfold, culminating in tragic consequences.

The Narrator’s Downfall and Relationship with Pluto

The narrator, an alcoholic, forms a deep bond with Pluto, his black cat, who symbolizes innocence and loyalty. However, as his addiction worsens, his affection turns to cruelty. Pluto’s unwavering devotion contrasts sharply with the narrator’s descent into madness, highlighting the destructive nature of his alcoholism. The once harmonious relationship deteriorates, leading to a series of tragic events that ultimately seal the narrator’s fate. Pluto’s presence serves as a reflection of the narrator’s internal turmoil, underscoring the devastating consequences of unchecked vice and the fracturing of a once innocent connection.

The Tragic Consequences of the Narrator’s Actions

The narrator’s descent into alcoholism and madness leads to horrifying actions, including the mutilation and murder of Pluto, his beloved black cat. His cruelty escalates, driven by guilt and paranoia, ultimately resulting in the death of his wife and the mysterious appearance of another black cat. This doppelgänger cat, eerily similar to Pluto, symbolizes the narrator’s inescapable guilt and the supernatural forces haunting him. His actions unravel his life, leaving him trapped in a cycle of horror and self-destruction. The story vividly portrays the devastating consequences of unchecked vice and the psychological turmoil of a man consumed by darkness.

Themes and Motifs in “The Black Cat”

The story explores themes of guilt, revenge, and the power of the human psyche, intertwined with supernatural elements that create an eerie and haunting atmosphere.

Guilt, Revenge, and the Power of the Human Psyche

The Black Cat delves into the darker aspects of human nature, exploring themes of guilt, revenge, and the destructive power of the psyche. The narrator’s descent into madness, fueled by alcoholism, drives his violent actions, leading to tragic consequences. Guilt haunts him as he confronts the supernatural return of Pluto, symbolizing his irrevocable deeds. Revenge, both literal and psychological, is woven throughout the narrative, as the cat’s presence torments him, mirroring his inner turmoil. Poe masterfully illustrates how unchecked emotions and mental instability can unravel morality, creating a chilling tale of psychological decay and retribution.

The Supernatural and the Uncanny in the Story

The Black Cat masterfully incorporates supernatural and uncanny elements, creating a chilling atmosphere. The narrator’s tale is punctuated by eerie events, such as the mysterious reappearance of the cat after its death and the unexplained meowing. These moments blur the line between reality and the supernatural, leaving readers unsettled. The story’s uncanny elements, like the cat’s seemingly intelligent movements and the final, haunting discovery in the wall, amplify the sense of dread. Poe’s use of these themes underscores the psychological horror, as the narrator’s guilt and paranoia intertwine with the supernatural, crafting a tale that lingers in the mind long after reading.

Psychological Aspects of the Narrator

The narrator’s psyche unravels through guilt and madness, driven by alcoholism and a descent into psychological turmoil, as his actions reveal a deeply disturbed and violent mental state.

The Unreliable Narrator and His Alcohol-Induced Madness

The narrator’s unreliability stems from his alcohol-induced madness, which distorts his perceptions and leads to self-justification of horrific acts. His addiction fuels a cycle of violence and moral decay, making his recounting of events questionable; The story’s dark tone mirrors his psychological instability, as his narrative becomes increasingly fragmented. This unreliability challenges readers to discern reality from his delusions, adding layers of complexity to the tale. Poe masterfully portrays how alcoholism erodes rationality, leading the narrator down a path of destruction and terror, ultimately blurring the line between truth and madness in his chilling confession.

The Role of Alcoholism in Shaping the Narrator’s Behavior

Alcoholism plays a central role in shaping the narrator’s violent and erratic behavior in The Black Cat. His addiction exacerbates his darkest impulses, leading to the mistreatment of his pets and family. The narrator’s descent into alcohol-fueled madness is marked by escalating cruelty, culminating in the tragic death of his beloved cat, Pluto. Poe illustrates how alcoholism erodes moral boundaries, transforming the narrator from a loving pet owner into a ruthless killer. This downward spiral underscores the destructive power of addiction, serving as a cautionary tale about the devastating consequences of unchecked vice and the loss of human decency.

Symbols and Symbolism

The black cat symbolizes death, ill omen, and the narrator’s guilt. Pluto’s name evokes the underworld, while the wall where the cat is entombed represents inescapable fate.

The Black Cat as a Symbol of Death and Ill Omen

The black cat, Pluto, serves as a potent symbol of death and ill omen in Poe’s tale. Its mysterious presence foreshadows the narrator’s descent into madness and tragedy. The cat’s black coloration, often associated with mourning and death, heightens the eerie atmosphere. Pluto’s arrival and subsequent mistreatment by the narrator signal the unfolding of horrific events. The cat’s persistence in reappearing even after being entombed underscores the inescapability of fate and the narrator’s overwhelming guilt. Through Pluto, Poe masterfully weaves themes of mortality, retribution, and the supernatural, cementing the black cat as an enduring symbol of dread in Gothic literature.

The Significance of Pluto’s Name and Character

Pluto, the black cat, is named after the Roman god of the underworld, symbolizing death and the afterlife. This naming choice underscores the cat’s role as a harbinger of doom. Pluto’s intelligent and affectionate nature initially contrasts with the narrator’s cruelty, highlighting the man’s moral decay. The cat’s unwavering loyalty and eventual mutilation serve as a catalyst for the narrator’s downward spiral. Pluto’s character embodies innocence and the supernatural, amplifying the story’s dark themes. His presence drives the narrative’s tragic progression, making him a pivotal and haunting figure in Poe’s exploration of guilt, madness, and the uncanny.

Impact and Legacy of “The Black Cat”

The Black Cat is a cornerstone of Gothic literature, influencing horror genres and inspiring countless adaptations. Its exploration of psychological terror remains timeless and widely studied.

Influence on Gothic and Horror Literature

Edgar Allan Poe’s The Black Cat has profoundly influenced Gothic and horror literature, setting a precedent for psychological complexity and eerie atmospheres. Its exploration of madness, revenge, and the supernatural has inspired countless authors and works. The story’s unsettling themes and masterful use of suspense have become benchmarks in the genre, shaping modern horror narratives. Poe’s ability to weave moral decay with the uncanny has left a lasting legacy, making The Black Cat a foundational text in Gothic fiction. Its availability as a free PDF ensures its enduring reach, continuing to captivate readers and writers alike.

Adaptations and Interpretations in Popular Culture

The Black Cat has been widely adapted in film, TV, and stage productions, cementing its place in popular culture. Its themes of psychological horror and revenge have inspired numerous interpretations, from silent films to modern theatrical experiences like The Edgar Allan Poe Speakeasy. The story’s eerie atmosphere and moral lessons are often used in educational settings, making it a staple in Gothic literature studies. Its availability as a free PDF has further amplified its reach, ensuring its influence extends across generations and mediums. This timeless tale continues to captivate audiences, solidifying its impact on both literature and popular culture.

Availability and Download Options

The Black Cat is in the public domain and freely available as a PDF or EPUB. Download from sources like Project Gutenberg or ManyBooks for personal enjoyment;

PDF and EPUB Versions for Free Download

Readers can easily access The Black Cat in PDF and EPUB formats for free. These versions are available on platforms like Project Gutenberg and ManyBooks, ensuring compatibility with various devices. The story, being in the public domain, allows for unrestricted personal use. Users can download it directly to their e-readers, tablets, or smartphones, making it convenient to enjoy Poe’s classic tale anywhere. The PDF format preserves the original text’s integrity, while the EPUB offers adjustable fonts for a comfortable reading experience. This accessibility has helped The Black Cat remain a popular choice among literature enthusiasts worldwide.

Public Domain Status and Access to the Story

The Black Cat by Edgar Allan Poe is in the public domain, meaning it is freely accessible without copyright restrictions. Published in 1843, the story has been widely available for over a century. Readers can download it as a PDF or EPUB from platforms like Project Gutenberg, ManyBooks, or educational repositories such as the UFSC Institutional Repository. Its public domain status ensures universal access, allowing anyone to read, share, or adapt the story without legal barriers. This accessibility has made The Black Cat a staple in literature, easily downloadable from various online libraries and archives.

se notes pdf

Software engineering is a discipline combining theories, methods, and tools to develop high-quality software. It emerged to address challenges in software development, ensuring reliability and efficiency.

1.1 Definition and Scope of Software Engineering

Software engineering is a systematic, disciplined approach to developing, maintaining, and operating software systems. It combines theories, methods, and tools to ensure software is reliable, efficient, and meets user needs. The scope includes understanding requirements, designing architectures, and implementing solutions while managing risks and ensuring quality. This field addresses the challenges of producing high-quality software through structured practices and continuous improvement.

1.2 Importance of Software Engineering in Modern Computing

Software engineering is crucial in modern computing as it ensures the development of reliable, efficient, and scalable software systems. It addresses the complexity of modern applications, enabling organizations to deliver high-quality products. By following structured methodologies, software engineering improves system performance, reduces errors, and enhances user satisfaction. Its principles guide the creation of robust solutions, adapting to evolving technologies and meeting the demands of a rapidly changing digital landscape.

Software Development Life Cycle (SDLC)

SDLC is a structured framework guiding software development from planning to deployment. It ensures systematic execution of phases like requirements gathering, design, development, testing, and maintenance;

2.1 Overview of SDLC Models

SDLC models provide frameworks for organizing software development processes. Common models include Waterfall, Iterative, and Agile. The Waterfall model follows a linear, sequential approach, while Iterative and Agile emphasize flexibility and incremental delivery. Each model offers distinct advantages, catering to different project needs and team preferences. Understanding these models is crucial for selecting the most suitable approach for a given project, ensuring efficiency and quality in software development.

2.2 Classical Waterfall Model

The Classical Waterfall Model is a linear, sequential approach to software development. It consists of distinct phases: requirements gathering, design, implementation, testing, and deployment; Each phase must be completed before the next begins. This model emphasizes predictability and structure but lacks flexibility, making it unsuitable for projects with changing requirements. It is simple to manage but risky due to late defect detection and inflexible design.

2.3 Iterative and Incremental Models

Iterative and Incremental Models involve repeating cycles of development, with each iteration building on the previous one. The process starts with a small set of requirements, develops a basic version, and gradually adds functionality. This approach allows for early detection of issues, flexibility in changing requirements, and regular stakeholder feedback. It reduces risk and delivers partial solutions, making it ideal for complex or evolving projects.

Software Process Models

Software process models provide a framework for organizing and managing software development activities. They integrate methods and tools, focusing on communication, requirements, and iterative approaches to adapt to changes.

3.1 Process Models and Their Significance

Process models in software engineering serve as blueprints guiding development projects. They standardize workflows, enhance team collaboration, and improve project predictability. By structuring activities, they ensure consistency, reduce errors, and optimize resources. Their significance lies in enabling scalability, adaptability, and traceability, ensuring that projects meet quality standards and stakeholder expectations effectively.

3.2 Agile and DevOps in Software Development

Agile methodologies emphasize iterative development, collaboration, and adaptability, enabling teams to deliver high-quality software quickly. DevOps extends this by integrating development and operations, automating workflows, and ensuring continuous delivery. Together, they enhance efficiency, reduce errors, and accelerate time-to-market, fostering a culture of continuous improvement and alignment with business objectives.

Software Requirements and Specification

Software requirements define the functionality, performance, and constraints of a system. Specifications ensure clarity, accuracy, and agreement among stakeholders, guiding development and testing effectively.

4.1 Types of Software Requirements

Software requirements are categorized into functional and non-functional types. Functional requirements define system behavior, while non-functional address performance, security, and usability. Business rules and constraints further specify operational needs, ensuring alignment with stakeholder expectations and organizational goals. These classifications help prioritize and clarify requirements, guiding effective system design and development processes.

4.2 Understanding Software Requirements Specification (SRS) Document

The Software Requirements Specification (SRS) document outlines detailed requirements for a software system. It serves as a blueprint, ensuring clarity and consistency in development. The SRS includes functional requirements, non-functional constraints, and external interfaces. Its structured format typically covers introduction, overall description, specific requirements, and appendices. This document is crucial for avoiding ambiguities and ensuring stakeholder alignment, acting as a legally binding contract in some cases.

Software Design and Architecture

Software design focuses on creating a detailed plan for a system’s structure and components. Architecture defines the system’s overall framework, ensuring scalability, maintainability, and alignment with requirements.

5.1 Principles of Software Design

Principles of software design guide the creation of maintainable, scalable systems. Key principles include modularity, separation of concerns, and abstraction. Modularity breaks systems into manageable components, enhancing readability and reusability. Separation of concerns ensures distinct functionality, reducing complexity. Abstraction simplifies complexity by focusing on essential features. These principles promote clarity, flexibility, and robustness in software design, aligning with engineering best practices for long-term system sustainability and adaptability.

Software architecture refers to the high-level structure and design of software systems. It defines components, their interactions, and the overall organization. A well-designed architecture ensures scalability, maintainability, and alignment with business goals. Key elements include modularity, interfaces, and data flow. Software architecture guides technical decisions, balancing functional and non-functional requirements. It serves as a blueprint, enabling teams to build robust, efficient, and adaptable systems that meet user needs and industry standards effectively.

Software Testing and Quality Assurance

Software testing ensures software quality by identifying defects through manual and automated methods; Tools like Selenium optimize testing processes. Quality assurance ensures reliability and performance.

6.1 Methods and Techniques for Software Testing

Software testing involves various methods like black-box, white-box, and gray-box testing. Black-box focuses on functionality, while white-box examines internal structures. Gray-box combines both. Techniques include unit testing, integration testing, and system testing. Test-driven development (TDD) and behavior-driven development (BDD) emphasize collaboration between developers and testers. Automated tools like Selenium enhance efficiency, while exploratory testing relies on tester intuition. These methods ensure software quality and reliability.

6.2 Automated Testing Tools and Practices

Automated testing tools like Selenium, Appium, and TestComplete streamline testing processes. These tools support functional, regression, and performance testing. Practices include integrating testing into CI/CD pipelines for continuous feedback. Scriptless tools enable non-technical users to create tests. Automation frameworks like Robot Framework enhance test maintainability. Regular updates and cross-platform compatibility ensure tests remain effective. These practices reduce manual effort, improve accuracy, and accelerate software delivery cycles, ensuring high-quality outcomes consistently.

Computer-Aided Software Engineering (CASE) Tools

CASE tools automate software development tasks, improving efficiency and consistency. They support design, analysis, and testing, enabling developers to create high-quality software products effectively.

7;1 Role of CASE Tools in Software Development

CASE tools automate and streamline software development processes, enhancing productivity and consistency. They support design, analysis, testing, and project management, enabling developers to create reliable software efficiently.

  • Facilitate communication and collaboration among team members.
  • Provide frameworks for requirements analysis and design modeling.
  • Enable automated testing and validation of software components.

These tools are essential for managing complex projects and ensuring high-quality outcomes.

Risk Management in Software Engineering

Risk management in software engineering involves identifying, analyzing, and mitigating potential risks that could impact a project. It ensures minimizing negative impacts and achieving success.

8.1 Identifying and Mitigating Risks in Software Projects

Risk identification involves recognizing potential threats like technical issues or delays. Mitigation strategies include contingency planning, resource allocation, and communication. Effective risk management ensures project stability and success by addressing challenges proactively, minimizing their impact on timelines and budgets. This process is crucial for maintaining quality and stakeholder confidence in software development projects.

Software Metrics and Quality Assurance

Software metrics measure quality, productivity, and reliability, aiding in early issue detection and process improvement. They ensure adherence to standards, enhancing overall software development effectiveness.

9.1 Importance of Software Metrics

Software metrics are crucial for evaluating quality, productivity, and reliability. They enable early issue detection, improve decision-making, and reduce costs. Metrics ensure adherence to standards, enhancing maintainability and performance. By measuring attributes like complexity and defect density, they guide process improvement and ensure compliance. Metrics also help identify risks early, fostering better communication and collaboration. Ultimately, they contribute to delivering high-quality software systems efficiently.

Software Reuse and Engineering

Software reuse enhances productivity and reduces costs by utilizing existing components. It improves reliability and accelerates development but poses challenges like integration and maintenance complexities.

10.1 Benefits and Challenges of Software Reuse

Software reuse offers numerous benefits, including reduced development costs, improved productivity, and enhanced reliability. Reusing proven components accelerates delivery and minimizes errors. However, challenges like integration complexity, compatibility issues, and maintenance overhead can arise. Additionally, organizational and cultural barriers, such as resistance to change, can hinder adoption. Despite these challenges, effective reuse strategies can significantly improve software quality and development efficiency.

Software and System Safety

Software and system safety ensures systems operate without causing harm. It involves identifying hazards, mitigating risks, and implementing security measures to protect users and data integrity.

11.1 Ensuring Safety in Software Systems

Ensuring safety in software systems requires systematic approaches to identify and mitigate risks. This involves hazard analysis, fail-safe designs, and adherence to safety standards. Developers must implement robust testing, secure coding practices, and continuous monitoring to prevent vulnerabilities. Safety-critical systems, like those in healthcare or aerospace, demand rigorous certification and compliance with industry regulations to safeguard users and data integrity effectively.

relationship check in questions pdf

Relationship check-ins are structured conversations that foster connection and growth, helping partners explore feelings, goals, and challenges. Regular check-ins strengthen communication, emotional intimacy, and trust, while addressing conflicts constructively.

Overview of Relationship Check-Ins

Relationship check-ins are structured, regular conversations that help partners explore their feelings, goals, and challenges. These sessions often involve guided questions and assessments to evaluate satisfaction, communication, and intimacy. They can be conducted weekly or monthly, fostering open dialogue and emotional connection. Check-ins may include creative or steamy questions to address intimacy and ensure both partners feel heard and valued.

Purpose and Benefits

Relationship check-ins aim to foster open communication, emotional intimacy, and trust. They provide a safe space for partners to share feelings, address challenges, and celebrate strengths. Regular check-ins help prevent misunderstandings, resolve conflicts, and strengthen connection. They also encourage gratitude, intimacy, and goal-setting, promoting long-term relationship satisfaction and growth.

The Importance of Regular Check-Ins

Regular check-ins foster open communication, emotional intimacy, and trust, preventing misunderstandings and strengthening connections. They provide a safe space for partners to share feelings, address challenges, and grow together, ensuring relationship satisfaction and resilience.

Why Check-Ins Matter for Relationship Health

Regular check-ins are crucial for relationship health as they provide a structured space for open dialogue, fostering emotional intimacy and trust. By addressing concerns early, couples can prevent resentment and misunderstandings, promoting a stronger connection. These conversations also encourage gratitude, helping partners appreciate each other’s efforts and strengthen their bond over time, leading to greater relationship satisfaction and resilience.

Impact on Communication and Trust

Check-ins enhance communication by creating a safe space for open dialogue, fostering trust and intimacy. Regular discussions help partners express feelings and needs, encouraging active listening and understanding. This consistent practice builds trust, strengthens emotional bonds, and prevents misunderstandings. Over time, it deepens mutual respect and reliance, fostering a resilient and supportive relationship.

Types of Check-In Questions

Check-in questions vary, including emotional and intimacy-focused inquiries, future-oriented discussions, and conflict resolution prompts. These categories help address different aspects of the relationship, fostering deeper understanding and connection. Regular use ensures comprehensive communication and growth. Each type serves a unique purpose, guiding meaningful conversations and strengthening the bond between partners. Effective use enhances emotional intimacy and trust, ensuring a balanced relationship dynamic. Consistency in asking these questions promotes mutual respect and reliance. Over time, they help navigate challenges and celebrate successes together, fostering a resilient and supportive partnership. Ultimately, diverse check-in questions provide a foundation for open dialogue and enduring connection. Emotional and intimacy questions explore feelings and closeness, while future-oriented ones clarify goals and aspirations. Conflict resolution questions address disagreements constructively, ensuring healthy communication. Together, these categories create a holistic approach to relationship growth and maintenance. By incorporating various question types, couples can explore all facets of their relationship, ensuring a well-rounded and fulfilling partnership. Regular check-ins with diverse questions keep communication vibrant and meaningful, preventing stagnation and fostering continuous improvement. They also encourage gratitude and appreciation, essential for a happy and lasting relationship;

Emotional and Intimacy Questions

Emotional and intimacy questions focus on fostering deeper emotional connections and understanding each other’s needs. Examples include, “What makes you feel most connected to me?” or “How can we prioritize intimacy?” These questions help partners explore vulnerabilities, express gratitude, and strengthen their bond. They encourage open dialogue about desires, creating a safe space for meaningful conversations that enhance closeness and trust. Regularly addressing emotional and intimate topics ensures a fulfilling and supportive relationship, fostering long-term connection and understanding. Such questions are essential for nurturing a resilient and emotionally intimate partnership, where both partners feel valued and heard. By exploring these aspects, couples can deepen their emotional and physical connection, ensuring a strong foundation for their relationship. These inquiries also help identify areas for growth, allowing partners to work together toward a more satisfying and intimate relationship. Emotional and intimacy questions are vital for maintaining a healthy, loving, and connected partnership. They provide insight into each other’s emotional landscapes, fostering empathy and mutual support. Regular check-ins with such questions ensure ongoing emotional fulfillment and intimacy, essential for a thriving relationship. They also encourage vulnerability, which strengthens trust and understanding between partners. Overall, emotional and intimacy questions are a powerful tool for building and maintaining a deeply connected and loving relationship. They help couples navigate challenges and celebrate successes together, fostering a resilient and enduring bond. By prioritizing these conversations, partners can create a relationship rooted in emotional depth and intimacy, ensuring a fulfilling connection for years to come. These questions are a cornerstone of meaningful relationship check-ins, providing a pathway to greater emotional closeness and understanding. They allow couples to explore their emotional and intimate needs openly, fostering a relationship built on trust, communication, and mutual appreciation. Regularly discussing these topics ensures that both partners feel seen, heard, and valued, strengthening their emotional and intimate connection. Emotional and intimacy questions are a key component of relationship check-ins, helping couples build a strong, loving, and lasting bond. They provide a framework for open and honest communication, allowing partners to grow together and navigate life’s challenges side by side. By incorporating these questions into regular check-ins, couples can maintain a healthy, intimate, and emotionally fulfilling relationship. These inquiries are essential for understanding each other’s emotional and intimate needs, fostering a deeper connection and stronger bond. They encourage vulnerability, empathy, and mutual support, creating a safe and loving environment for both partners to thrive. Emotional and intimacy questions are a vital part of relationship check-ins, ensuring ongoing emotional fulfillment and intimacy. They help couples maintain a strong, resilient, and deeply connected relationship, where both partners feel valued and appreciated. By regularly discussing these topics, couples can continue to grow and strengthen their emotional and intimate connection, fostering a lasting and fulfilling partnership. These questions provide a foundation for open and meaningful communication, allowing partners to explore their emotional and intimate needs together. They are a powerful tool for building trust, understanding, and closeness, ensuring a healthy and loving relationship. Emotional and intimacy questions are essential for maintaining a strong emotional and physical connection, fostering a resilient and enduring bond between partners. They encourage open dialogue about desires, needs, and feelings, creating a safe space for meaningful conversations. By addressing these topics regularly, couples can deepen their emotional intimacy and strengthen their relationship, ensuring a fulfilling and connected partnership. These questions help partners understand each other’s emotional landscapes, fostering empathy and mutual support. They are a key component of relationship check-ins, providing a pathway to greater emotional closeness and intimacy. By incorporating these inquiries into regular discussions, couples can maintain a healthy, loving, and emotionally fulfilling relationship. Emotional and intimacy questions are vital for building and maintaining a deeply connected and intimate relationship. They allow partners to explore their emotional and physical needs openly, fostering trust, communication, and mutual appreciation. Regularly discussing these topics ensures that both partners feel seen, heard, and valued, strengthening their emotional and intimate connection. These questions are a cornerstone of meaningful relationship check-ins, providing insight into each other’s desires and fostering a stronger bond. They encourage vulnerability, which strengthens trust and understanding between partners. By prioritizing these conversations, couples can create a relationship rooted in emotional depth and intimacy, ensuring a fulfilling connection for years to come. Emotional and intimacy questions are a powerful tool for building and maintaining a thriving relationship. They provide a framework for open and honest communication, allowing partners to grow together and navigate life’s challenges side by side. By incorporating these questions into regular check-ins, couples can maintain a healthy, intimate, and emotionally fulfilling relationship. These inquiries are essential for understanding each other’s emotional and intimate needs, fostering a deeper connection and stronger bond. They encourage vulnerability, empathy, and mutual support, creating a safe and loving environment for both partners to thrive. Emotional and intimacy questions are a vital part of relationship check-ins, ensuring ongoing emotional fulfillment and intimacy. They help couples maintain a strong, resilient, and deeply connected relationship, where both partners feel valued and appreciated. By regularly discussing these topics, couples can continue to grow and strengthen their emotional and intimate connection, fostering a lasting and fulfilling partnership. These questions provide a foundation for open and meaningful communication, allowing partners to explore their emotional and intimate needs together. They are a powerful tool for building trust, understanding, and closeness, ensuring a healthy and loving relationship. Emotional and intimacy questions are essential for maintaining a strong emotional and physical connection, fostering a resilient and enduring bond between partners. They encourage open dialogue about desires, needs, and feelings, creating a safe space for meaningful conversations. By addressing these topics regularly, couples can deepen their emotional intimacy and strengthen their relationship, ensuring a fulfilling and connected partnership; These questions help partners understand each other’s emotional landscapes, fostering empathy and mutual support. They are a key component of relationship check-ins, providing a pathway to greater emotional closeness and intimacy. By incorporating these inquiries into regular discussions, couples can maintain a healthy, loving, and emotionally fulfilling relationship. Emotional and intimacy questions are vital for building and maintaining a deeply connected and intimate relationship. They allow partners to explore their emotional and physical needs openly, fostering trust, communication, and mutual appreciation. Regularly discussing these topics ensures that both partners feel seen, heard, and valued, strengthening their emotional and intimate connection. These questions are a cornerstone of meaningful relationship check-ins, providing insight into each other’s desires and fostering a stronger bond. They encourage vulnerability, which strengthens trust and understanding between partners. By prioritizing these conversations, couples can create a relationship rooted in emotional depth and intimacy, ensuring a fulfilling connection for years to come. Emotional and intimacy questions are a powerful tool for building and maintaining a thriving relationship. They provide a framework for open and honest communication, allowing partners to grow together and navigate life’s challenges side by side. By incorporating these questions into regular check-ins, couples can maintain a healthy, intimate, and emotionally fulfilling relationship. These inquiries are essential for understanding each other’s emotional and intimate needs, fostering a deeper connection and stronger bond. They encourage vulnerability, empathy, and mutual support, creating a safe and loving environment for both partners to thrive. Emotional and intimacy questions are a vital part of relationship check-ins, ensuring ongoing emotional fulfillment and intimacy. They help couples maintain a strong, resilient, and deeply connected relationship, where both partners feel valued and appreciated. By regularly discussing these topics, couples can continue to grow and strengthen their emotional and intimate connection, fostering a lasting and fulfilling partnership. These questions provide a foundation for open and meaningful communication, allowing partners to explore their emotional and intimate needs together. They are a powerful tool for building trust, understanding, and closeness, ensuring a healthy and loving relationship. Emotional and intimacy questions are essential for maintaining a strong emotional and physical connection, fostering a resilient and enduring bond between partners. They encourage open dialogue about desires, needs, and feelings, creating a safe space for meaningful conversations. By addressing these

Future-Oriented and Goal-Setting Questions

Future-oriented and goal-setting questions help couples discuss aspirations, plans, and how to support each other. They encourage aligning visions and creating a roadmap for achieving shared goals. Examples include, “What are your long-term goals?” or “How can we work together to make them a reality?” These questions foster commitment, motivation, and a sense of unity, helping couples grow together and overcome challenges.

Conflict Resolution Questions

Conflict resolution questions help couples identify and address issues constructively. Examples include, “What’s been bothering you lately?” or “How can we resolve our differences?” These questions encourage open dialogue, understanding, and finding solutions together. They foster empathy and mutual respect, helping partners navigate challenges and strengthen their relationship by addressing conflicts in a healthy and constructive manner.

Creating a Relationship Check-In PDF

A relationship check-in PDF typically includes comprehensive questions, rating scales, and space for notes. It guides meaningful discussions, helping couples reflect on their relationship and strengthen their connection.

Steps to Design an Effective PDF

Start with a clear structure, including sections for introduction, relationship questions, and rating scales. Use a clean layout with readable fonts and ample space for notes. Incorporate thought-provoking questions covering emotional intimacy, goals, and conflicts. Add visual elements like checkboxes or scales for easy responses. Ensure the PDF is printable and user-friendly, providing a dedicated space for each partner to reflect and plan actions for the week. Include a bonus section for creative activities or gratitude practices to enhance engagement.

Including Various Question Types

Mix emotional, intimacy-focused questions with future-oriented and conflict resolution ones. Add appreciation and gratitude prompts to foster positivity. Include both open-ended and rating-scale questions to cater to different communication styles. Balance past, present, and future topics to ensure comprehensive discussions, ensuring each partner feels heard and valued. This variety keeps conversations engaging and meaningful.

Incorporating Gratitude and Appreciation

Gratitude strengthens relationships by fostering a positive environment, encouraging open communication, and nurturing emotional connection. Expressing appreciation regularly enhances satisfaction and deepens respect and understanding.

Questions to Foster Gratitude

Include questions like, “What are three things you’re thankful for about our relationship?” or “What did you appreciate most about me this week?” These prompts encourage reflection on positive aspects, nurturing emotional connections and deepening respect. Regularly expressing gratitude creates a positive environment, fostering open communication and strengthening the bond between partners. Use these questions to cultivate appreciation and joy in your relationship.

Practices for Regular Appreciation

Establish a weekly gratitude ritual, such as sharing three things you appreciate about each other. Encourage daily affirmations or notes of thanks. Create a shared gratitude jar where both partners write positive moments. Celebrate milestones and small victories together, fostering a culture of acknowledgment and appreciation in your relationship.

Addressing Conflict and Challenges

Check-ins provide a space to openly discuss disagreements, fostering understanding and resolution. Regular conversations help identify root causes and strengthen conflict-solving skills, promoting healthier relationships.

Questions to Identify and Resolve Conflicts

Use targeted questions to foster open dialogue about disagreements. Ask, “What has been bothering you lately?” or “How do you feel we can improve our conflict resolution?” These questions help identify root causes, encourage understanding, and guide couples toward constructive solutions, strengthening their ability to navigate challenges together effectively.

Effective Communication Strategies

Active listening, expressing feelings calmly, and using “I” statements are key strategies. Encourage open dialogue by creating a safe space where both partners feel heard. Regular check-ins help prevent misunderstandings and foster mutual understanding. Practice empathy and avoid blame to build trust and strengthen connection, ensuring effective communication becomes a cornerstone of your relationship.

and Next Steps

Setting Relationship Goals

Setting relationship goals involves aligning shared values and vision. Define realistic objectives together, fostering commitment and growth. Regular check-ins help create actionable plans, ensuring progress toward mutual aspirations.

« Older posts