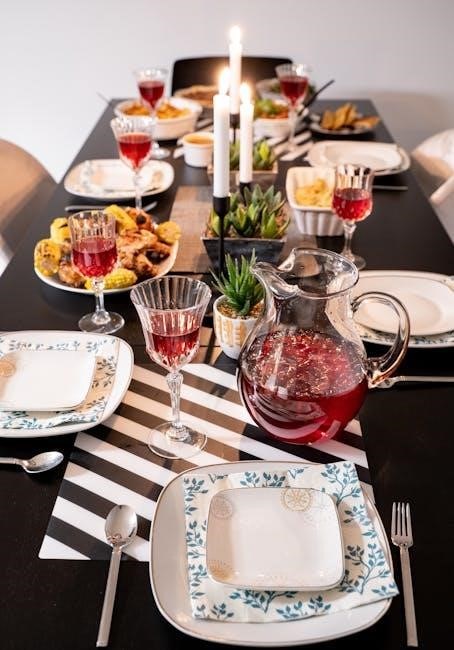
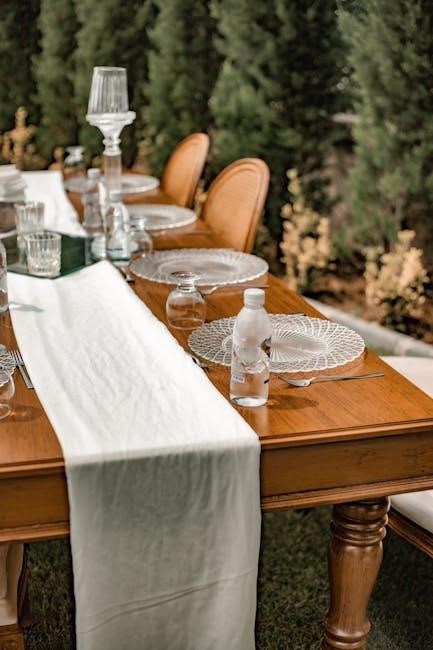
A quick and easy DIY project, the 10 Minute Table Runner is perfect for adding style to your home decor or as a last-minute gift. Designed by LaRae Bunnell Clark, it’s a great way to use leftover fabric and customize any space with minimal effort and time.
Overview of the Project
The 10 Minute Table Runner is a quick and straightforward sewing project designed to add style to any table setting. Using minimal fabric, it’s perfect for beginners or experienced sewists looking to complete a project fast. The pattern, often provided in PDF format, includes step-by-step instructions for a reversible design, making it versatile and eco-friendly. It’s ideal for using leftover fabric and requires basic sewing tools, ensuring a fun and efficient creative experience.
Why Choose the 10 Minute Table Runner
The 10 Minute Table Runner is a perfect choice for its speed and simplicity. It’s ideal for last-minute gifts or home decor updates. With minimal fabric requirements, it’s a great way to use leftover materials. The reversible design adds versatility, and the PDF pattern ensures easy access and step-by-step guidance. Perfect for all skill levels, it’s a quick, eco-friendly, and creative solution to enhance any table setting effortlessly.
Materials and Tools Required
Fabric requirements include 1/3 yard of theme print and 1/2 yard of backing. Essential tools are a sewing machine, rotary cutter, and mat for quick preparation.
Fabric Requirements
The 10 Minute Table Runner requires 1/3 yard of theme print and 1/2 yard of backing or border print, both width of fabric. Accent strips are optional for added detail. Use quilting cottons for durability and style. If fabrics differ in width, cut to match for consistency. This project is ideal for using leftover scraps, making it eco-friendly and budget-friendly. Choose coordinating prints for a polished look or mix patterns for a unique design.
Essential Sewing Tools
To complete the 10 Minute Table Runner, you’ll need basic sewing tools like a sewing machine, rotary cutter, mat, and ruler for precise cutting. Sharp scissors, straight pins, and an iron are also essential for smooth sewing and pressing seams. A seam ripper can help correct mistakes quickly. Ensure your machine is threaded with matching thread, and have a hand-sewing needle on hand for any final touches. These tools will help you work efficiently and achieve professional results.
Step-by-Step Instructions
- Cut fabric to desired size, ensuring accuracy for a polished finish.
- Sew sides together, leaving a small opening to turn the runner right side out.
- Press seams flat, then topstitch for a professional look.
- Hem the ends neatly to complete the project in minutes.

Preparation and Cutting Fabric
Begin by washing and drying your fabrics to pre-shrink them. Cut the theme print to 10-12 inches wide and the coordinating fabric to 18 inches wide, both at the full width of the fabric. Ensure the cuts are straight and even for a professional finish. If using directional prints, align the patterns carefully. This step sets the foundation for a quick and seamless sewing process.
- Theme fabric: 10-12″ wide (full width).
- Coordinating fabric: 18″ wide (full width).
- Match fabric widths if they differ.
Sewing the Runner Together
Align the theme and coordinating fabrics, right sides together. Sew along the lengthwise edges using a 1/4-inch seam allowance. Fold the runner in half lengthwise, then sew the short ends. Turn right side out and press the seams flat. For a professional finish, topstitch along the edges. This quick method ensures a polished look in minutes, perfect for beginners or experienced sewists.
- Sew lengthwise edges with 1/4″ seam.
- Fold and sew short ends.
- Press seams for a crisp finish.
- Optional topstitch for durability.
Customization Tips
Personalize your runner by choosing complementary fabrics and reversible designs. Add embellishments like ribbons or appliques for a unique touch. Experiment with seasonal patterns
to match any decor style, making it versatile for gifts or home use. Use leftover fabric scraps to create a one-of-a-kind design effortlessly.
Choosing the Right Fabrics
Selecting the right fabrics is key to creating a beautiful table runner. Use quilting cottons for durability and vibrant colors. Choose a theme print for the center and a coordinating fabric for the border or backing. Ensure fabrics are of similar width for a seamless look. Opt for seasonal prints to match your decor or use scraps for a unique, eco-friendly design. The combination should reflect your personal style and complement the room’s aesthetic, making the runner versatile for any setting or occasion.
Adding Embellishments
Enhance your table runner with simple embellishments like decorative stitching, ribbons, or appliques. Add a personalized touch with buttons or embroidery for a unique look. Use pre-made trims or iron-on designs for quick results. Ensure embellishments complement the fabric and overall design without overwhelming the runner. This step allows creativity, making each runner truly one-of-a-kind while maintaining the project’s quick and easy nature.
Benefits of the 10 Minute Table Runner
Quick and easy to make, this table runner is perfect for last-minute decor updates or gifts. Its simplicity makes it ideal for beginners while offering a stylish touch to any table setting.
Quick and Easy DIY Project
The 10 Minute Table Runner is a fast and straightforward DIY project, requiring minimal materials and simple sewing skills. Perfect for beginners or experienced sewists, it’s designed to be completed in just a few minutes. This project is ideal for using leftover fabric and adds a stylish touch to any table setting. Its quick turnaround makes it a great option for last-minute gifts or home decor updates.
Perfect for Last-Minute Gifts
The 10 Minute Table Runner is ideal for last-minute gifts, offering a thoughtful and personalized touch. Its quick completion time makes it perfect for sudden occasions, requiring minimal fabric and simple steps. Customize it with coordinating prints to suit any recipient’s style. This project is also eco-friendly, utilizing leftover fabric scraps. Whether for holidays, birthdays, or other events, it’s a practical and charming gift that adds warmth to any space.
Common Mistakes and Solutions
Common mistakes include uneven fabric alignment and overestimating the 10-minute timeframe. Solutions involve precise cutting, following pattern instructions, and allowing extra time for adjustments to ensure a professional finish.
Time Management Tips
Effective time management is key to completing the 10 Minute Table Runner quickly. Start by pre-cutting fabrics and having all tools ready. Break the project into simple steps: cutting, sewing, and finishing. Allocate 3 minutes for cutting, 5 minutes for sewing, and 2 minutes for final touches. Avoid distractions and stay focused to ensure the project stays within the 10-minute timeframe. This method ensures efficiency and a polished result.
Troubleshooting Fabric Issues
When working on the 10 Minute Table Runner, common fabric issues like slipping or mismatched widths can arise. To resolve these, pin fabrics securely before cutting and ensure they are cut to the same width. If fabric frays excessively, use a zigzag stitch or serge edges before sewing. For slippery fabrics, increase pinning and use a walking foot if available. Proper fabric alignment and tension will help achieve a professional finish quickly and efficiently.
PDF Pattern Details
The PDF pattern includes fabric requirements, step-by-step instructions, and a finished size of 14×40 inches, perfect for quick sewing with no interfacing needed.
What’s Included in the PDF
The PDF pattern provides a comprehensive guide with fabric requirements, step-by-step sewing instructions, and measurements. It includes a finished size of 14×40 inches, perfect for quick projects. The pattern also details materials needed, such as 1/3 yard of theme print and coordinating fabric, ensuring a seamless sewing experience. No interfacing is required, making it ideal for beginners or those looking for a fast DIY solution.
Downloading and Printing the Pattern
The PDF pattern is easily accessible via a direct link, ensuring quick download. Print the pattern on standard paper using a home printer. Ensure your printer is set to 100% scale to maintain accurate measurements. No special software is needed beyond a PDF viewer, making it user-friendly. After printing, review the instructions and fabric requirements before starting your project. This ensures a smooth and efficient sewing experience.
Variations and Similar Projects
Variations and Similar Projects
Explore the reversible table runner option for a dual-sided design. Discover other quick sewing projects, like the Twelve Minute Gift Wrap Bag, to enhance your DIY skills creatively.
Reversible Table Runner Option
Create a versatile and stylish reversible table runner using two complementary fabrics. This option allows you to switch up your decor effortlessly. Perfect for any occasion, it’s a great way to use leftover fabric and adds a professional touch to your project. The reversible design offers flexibility, making it ideal for seasonal changes or matching different room aesthetics. This feature enhances the practicality and charm of your 10-minute table runner.
Exploring Other Quick Sewing Projects
Beyond the 10-minute table runner, explore other speedy sewing ideas like the Twelve Minute Gift Wrap Bag or small fabric block projects. These quick creations are perfect for using leftover materials and adding personalized touches to your home or gifts. They offer a fun way to practice sewing skills while creating functional and stylish items in minimal time.
The 10 Minute Table Runner is a simple, quick project perfect for enhancing home decor or serving as a thoughtful gift. Beginner-friendly and customizable, it’s an ideal way to use leftover fabric and add a personal touch to any setting. Share your finished project and inspire others to create their own!
Final Thoughts and Encouragement
Creating a 10 Minute Table Runner is a rewarding and quick DIY project that adds a personal touch to any space. Perfect for beginners, it’s an excellent way to use leftover fabric and explore creativity. With its simplicity and versatility, this project offers a sense of accomplishment and inspiration to try more sewing endeavors. Share your finished runner with pride and enjoy the satisfaction of crafting something beautiful in just minutes!
Sharing Your Finished Project
Once your 10 Minute Table Runner is complete, share your creation on social media or sewing communities to inspire others. Showcase it in photos with good lighting and a clean background. Mention the fabrics you used and any custom touches for added context. Join forums or groups dedicated to quick sewing projects to connect with fellow crafters. Sharing your work can spark creativity and encourage others to try this speedy DIY project!
Leave a Reply
You must be logged in to post a comment.